|
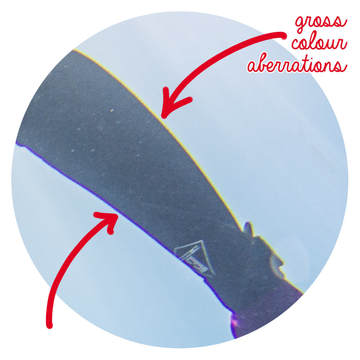
By Jill Smith Chromatic Aberrations are those ugly, coloured halos that may outline contrasted edges in an image. They are often bright blues and yellows, or magentas and greens. The colours of light (yes, white light is made up of colours; all the colours of the rainbow - same principles apply), don't all behave and bend the same way. That is why we get to see and enjoy rainbows (nice), but also why we have these gross distortions (not so nice). Here are two quick and dirty ways to banish them (one way is quicker and dirtier than the other, but it may not always be the answer). Method 1 RAW images - If your images have been shot in RAW file format, they may be opened in Camera Raw, and possibly corrected very easily there. Go to the Lens Corrections tab, and click the “Remove Chromatic Aberration” box at the top of the panel. Most of the time this will do a good job. That was easy.  Method 2 The following Chromatic Aberration Removal technique may be employed in the event that the Camera Raw feature did not completely remove the aberration, or if there is no RAW image to work with. This image sports arguably the most grotesque chromatic aberration I have ever seen. Notice how the distortion becomes more severe further away from the centre of the image. The distortion here is so terrible for a couple of reasons:
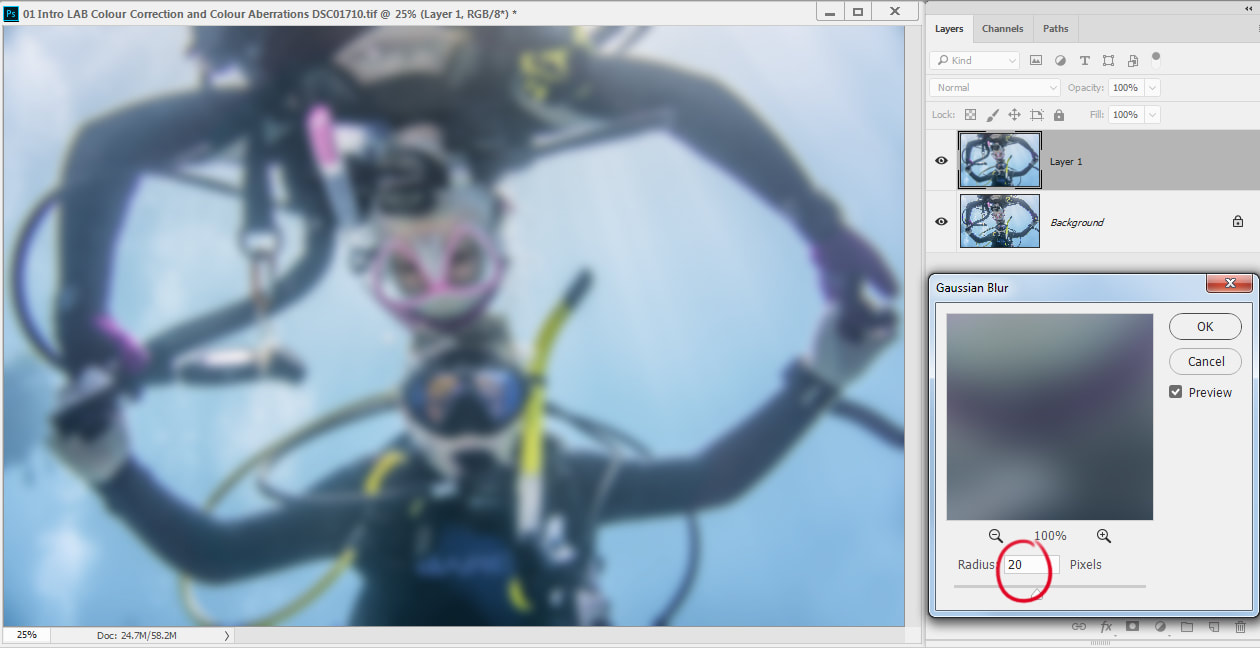
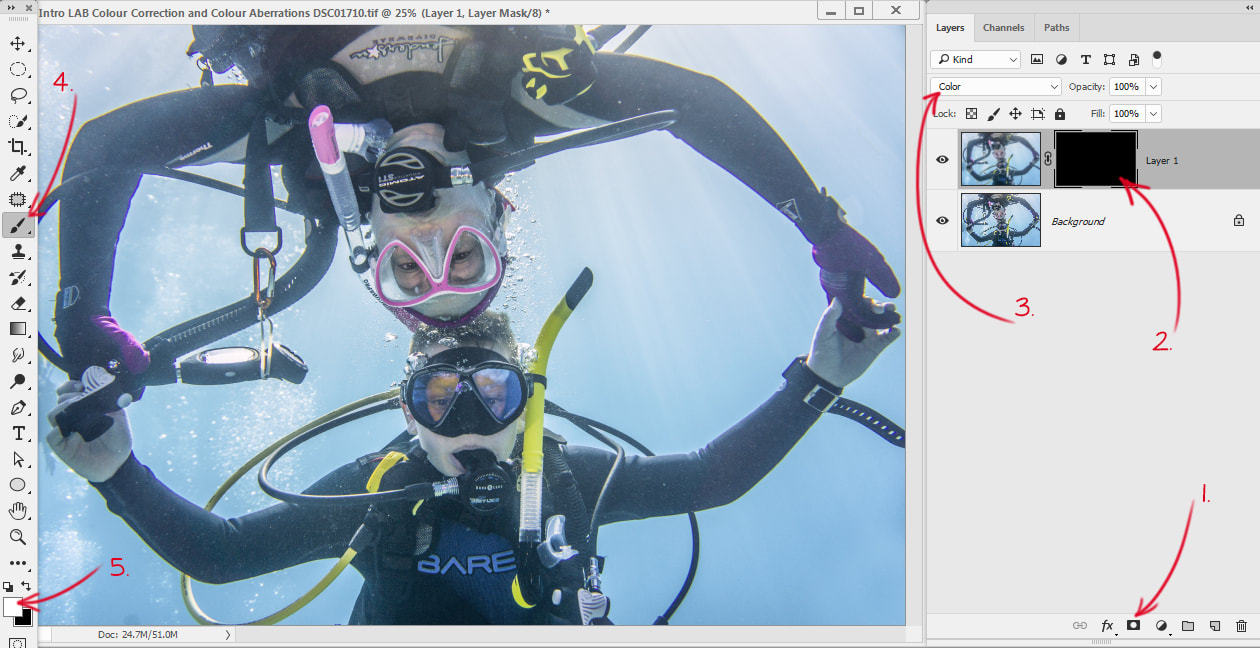
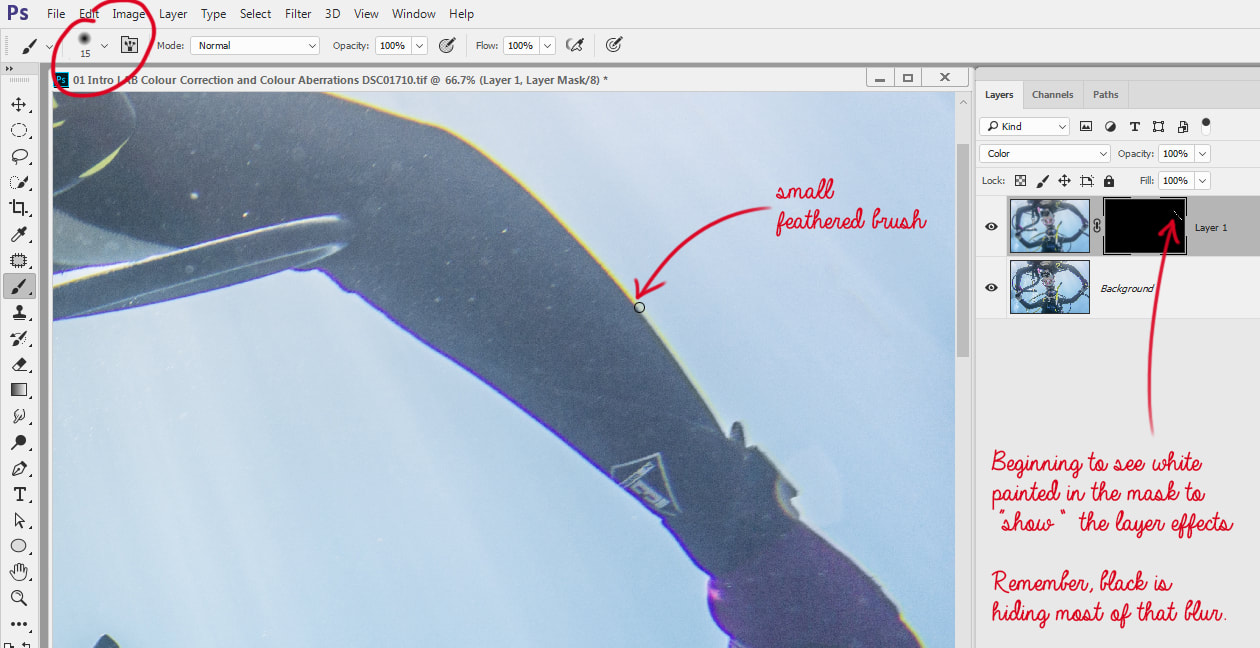
The Steps
This part of the process will be numbered to correspond with the figure below.
While the nasty colours have been taken care of, this particular image (and this section taken near the edge) was an extreme example, and I can still see the contrast on the edges. If I first ran this image through Camera Raw and checked the "Remove Chromatic Aberrations" box, they would have been largely removed, and the above method would have cleaned the rest up beautifully....but for this method, we wanted to work with the worst case scenario.
Happy Shooting and Editing!
0 Comments
Leave a Reply. |
FlickrAlbumAuthorsJill Smith Archives
January 2024
Categories
All
|
Our Services |
Company |
SupportOur Blog
|
|
Copyright © 2014
|
Newmarket, ON
|
(905) 898 5338
|


 RSS Feed

