|
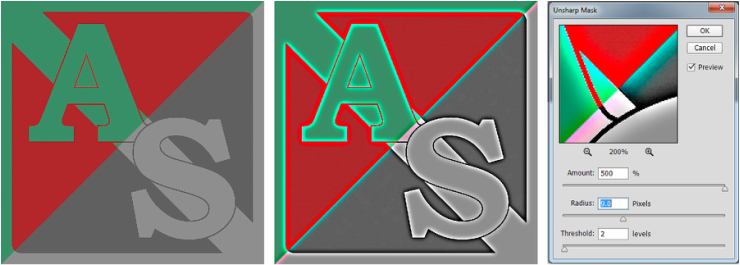
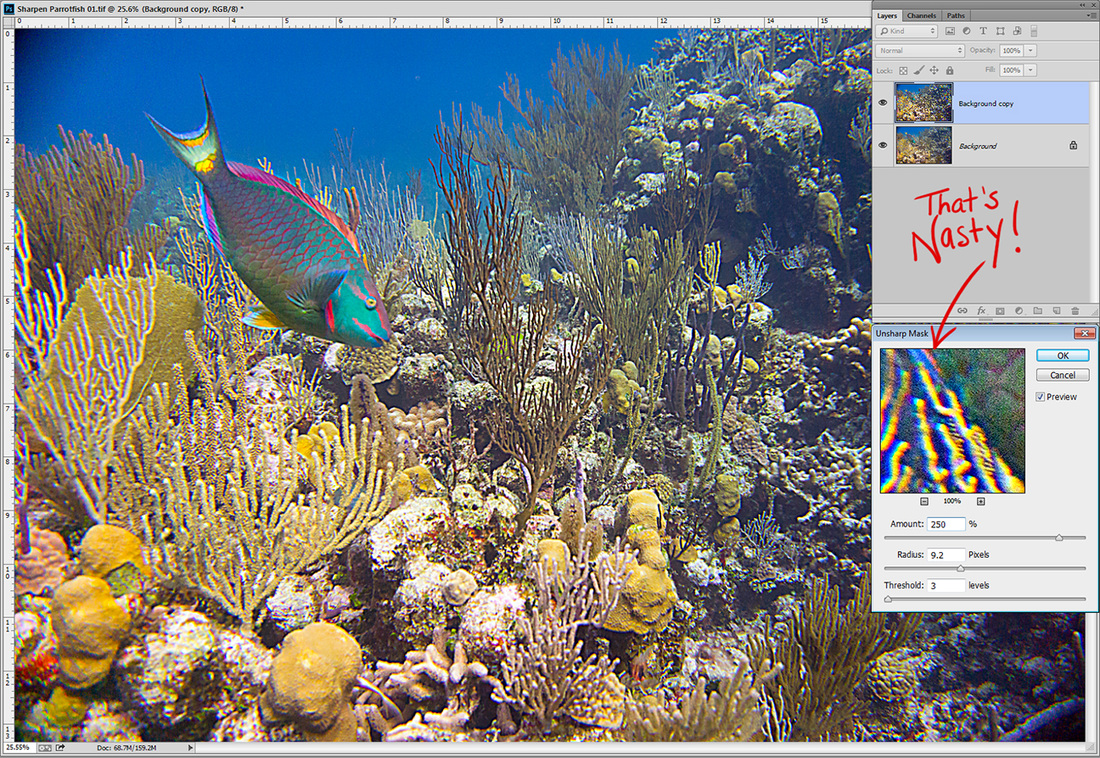
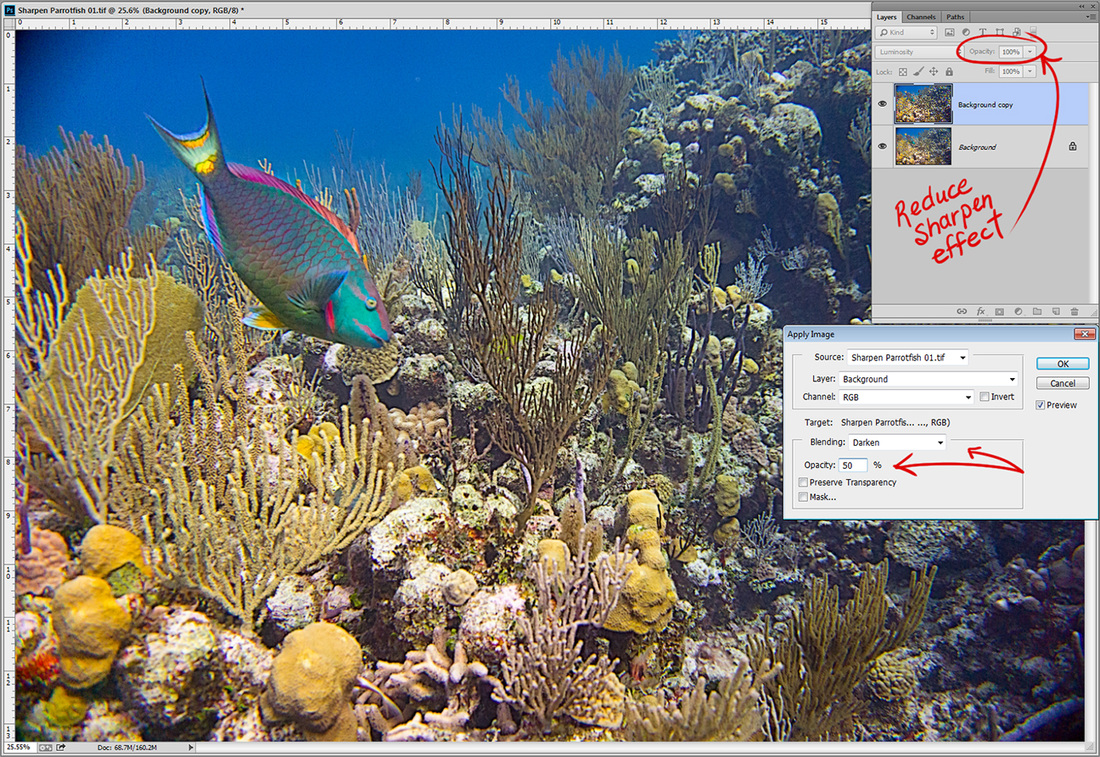
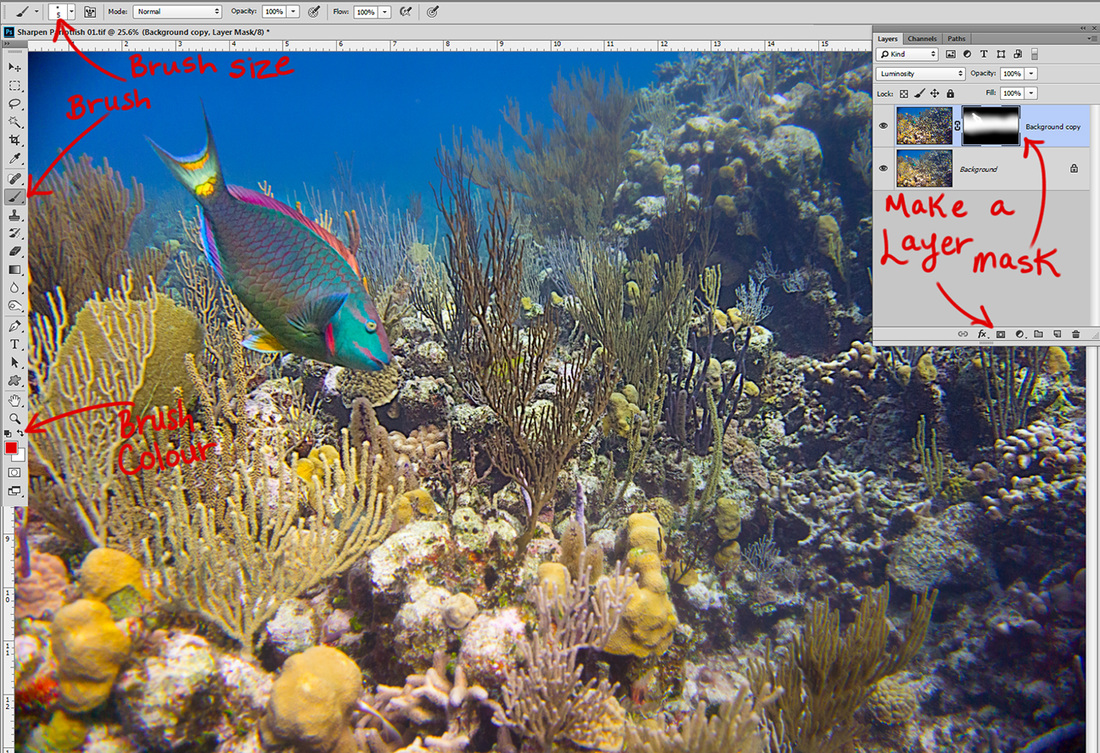
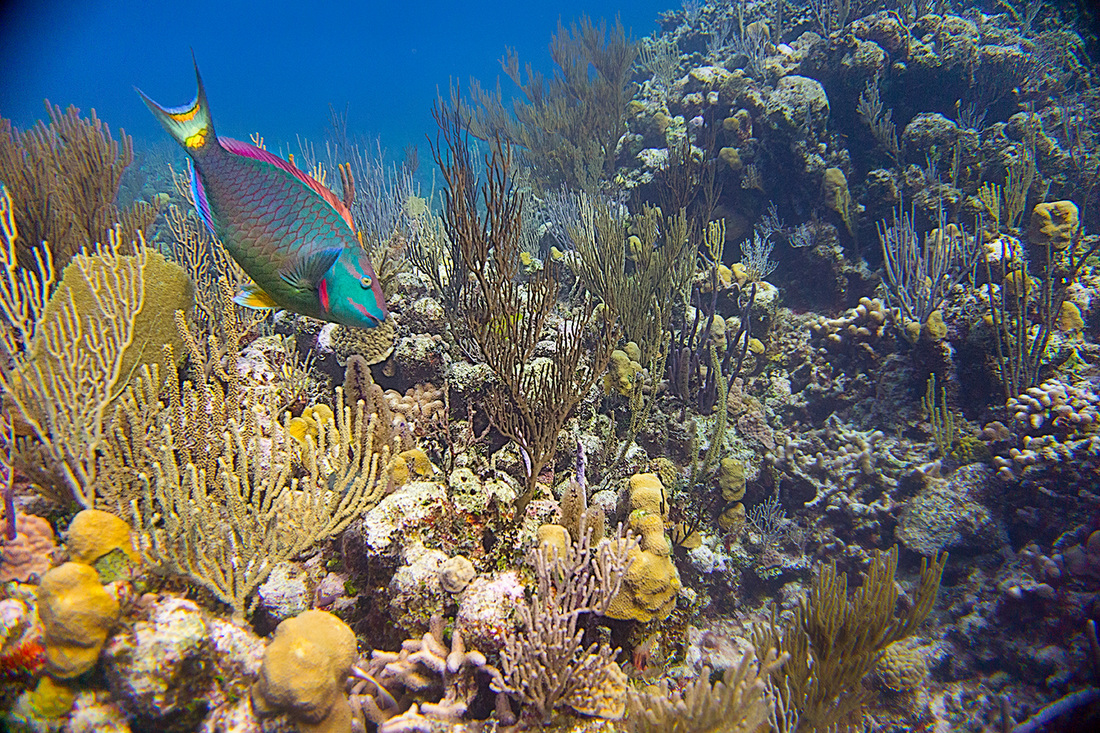
If you are an underwater photographer, you know that even your best work will need to undergo some image editing to make it the best it can be. In Photoshop we have some powerhouse sharpening options at our disposal, but I often find these image improvement tools to be a double-edged sword. Excessively glowing highlight halos and colour aberrations make a mess of any sharpen job, unless you know how to hold these undesirables at bay. Unsharp mask can be found under the menu > filter > Unsharp mask. The name comes from an old darkroom technique of making inverted, unsharp negatives of the original, sandwiching them with a glass plate, and re-exposing to reveal a sharp edge. In Adobe Photoshop®, the "Unsharp Mask" tool looks for edges in an image. Within the dark side of an edge, a dark halo is created, and within the light side of the edge, a light halo is created, boosting the contrast of the detail. There are three settings to consider: Amount - The higher the percentage, the stronger the effect. Radius - The range of pixels on either side of the determined edge that will be affected. Threshold - The level of difference in tonal values between pixels before they are considered to be edge pixels. Keep this value low, roughly between 0 and 5. There are two general methods of sharpening with this tool: High Amount (around 500%), Low Radius (1-2 pixels) – Good for sharpening tiny detail in an image. If there is any noise present, this setting may increase chatter to an unpleasant degree (read: that pesky backscatter). Keep threshold between 0-5 levels of difference for edge finding. Incidentally, if you are sharpening images of faces above the water, this method is usually undesirable. It will sharpen every line and pore in the skin of your subject, and personally, while I have earned every wrinkle on my face and do not need to have them removed, I certainly do NOT wish to have them enhanced! Lower Amount (30 – 150%), High Radius (5 – 30 pixels) – To find just the right radius, set the Amount to 500% temporarily. Slowly move your radius slider up until you see clear definition of the detail in the main subject of the image. Reduce Amount to desired level. There are two problems when using Unsharp mask in RGB colour mode in Photoshop. The first is that you will find some very nasty colour aberration effects along the edges in your image. This is a result of the sharpening algorithm and the way it functions; as you can see in the image above, there are halos created along the edges, and the colours of those halos are usually very intense, deeply saturated colours. The second problem is the introduction of bright white halos, particularly around fine detail such as fan-coral, which tend to be distracting to our eyes. There are many techniques to solve both of these problems. Here is one of them. Open Image to be sharpened: 1. Duplicate the layer in the Layers Palette (Ctrl J). There is now a locked Background layer, and Layer 1 (Background Copy), which is active because it is highlighted blue. *The layers palette can be found on the right side of your desktop. Activate the Layers tab so you can see the layers listed there. 2. From the menu bar across the top of the program, go to Filter > Sharpen > Unsharp mask. The little window shows a zoomed portion of the image. In the figure below, you can see the colour aberrations present due to the sharpen settings chosen. Click anywhere in the image to see that section in the zoom window. When you click and hold your mouse inside the window, you will see the "before" version, and when you release the mouse, you will see the "after sharpen effects applied" version. Set your amount to 500% while you visually choose a radius that defines the edges nicely in your image; then bring the amount back down. 3. Under the Layers tab, there is a blending option. It defaults to Normal - click that box to reveal a dropdown menu, and very near the bottom, choose luminosity. This is instructing the program to use the luminosity (detail) of the top layer, but use the colour from the bottom layer to blend these layers together. This will eliminate the colour aberrations created by the unsharp mask. 4. Now to reduce the exaggerated white halos while keeping the dark halos and edge contrast. While the top layer is still active, go to Image > Apply Image (top menu bar). Source 1 is your active image. Layer needs to be changed from Merged, to the Background layer (the unsharpened version, which is absent of white halos). Channel may remain at RGB. Blending mode should be changed to Darken. This will tell Photoshop to blend your background layer with your sharpened version by comparing each pixel between the two, and using whichever pixel is darker. This will eliminate the white halos entirely when the Opacity is at 100%, but reducing that to 50% will allow the halos to show through at half strength. 5. Now that the colour aberrations and white halos have been taken care of, you may determine if you want to keep this sharpening effect at full strength, or if you think you may have been heavy handed, you may reduce the opacity of the top layer. Opacity is to the right of the Layer blend option in the Layers Palette near the top. 6. Tip: The nature of human sight is such that we can only focus on one area at a time. While our sight is focussed on one area in our vision, our peripheral vision is out of focus and somewhat de-saturated (colourless). Sometimes I will make a conscious effort to replicate that effect in an image (although I am partial to very colourful images, so it is not too often) in order to make the subject stand out brighter, sharper, and more colourful than everything else. I will create a layer mask after my sharpening has been applied, and mask out the sharpening effects on the foreground and/or background, keeping the subject in sharpest focus. To do so, click the “add a mask” icon at the bottom of the Layer’s palette while holding the Alt key down (see figure below). This adds a black mask over your sharpened layer, which hides all of the work you have just done. That’s ok, because now you can “paint in” the sharpening effects where you want them. Choose the paintbrush from the tool bar (shown below), set your brush size and hardness (set hardness to 0 so that your brush is soft and feathers the effect in) in the Options bar. You will need to paint in the mask with white to “show” the sharpening effects of your work in those areas. Set the brush colour to white by hitting the “D” key on the keyboard, making the foreground swatch black, and the background swatch white (shown below at the bottom of the tool bar), and then hit the “X” key to switch them. Your brush is now white. Make sure the mask is active rather than the image itself, by clicking in the middle of the black mask icon on the layer bar. When you are done, click the drop down arrow on the right side of the layers palette, and choose Flatten. Save.
1 Comment
|
FlickrAlbumAuthorsJill Smith Archives
January 2024
Categories
All
|
Our Services |
Company |
SupportOur Blog
|
|
Copyright © 2014
|
Newmarket, ON
|
(905) 898 5338
|






 RSS Feed

