
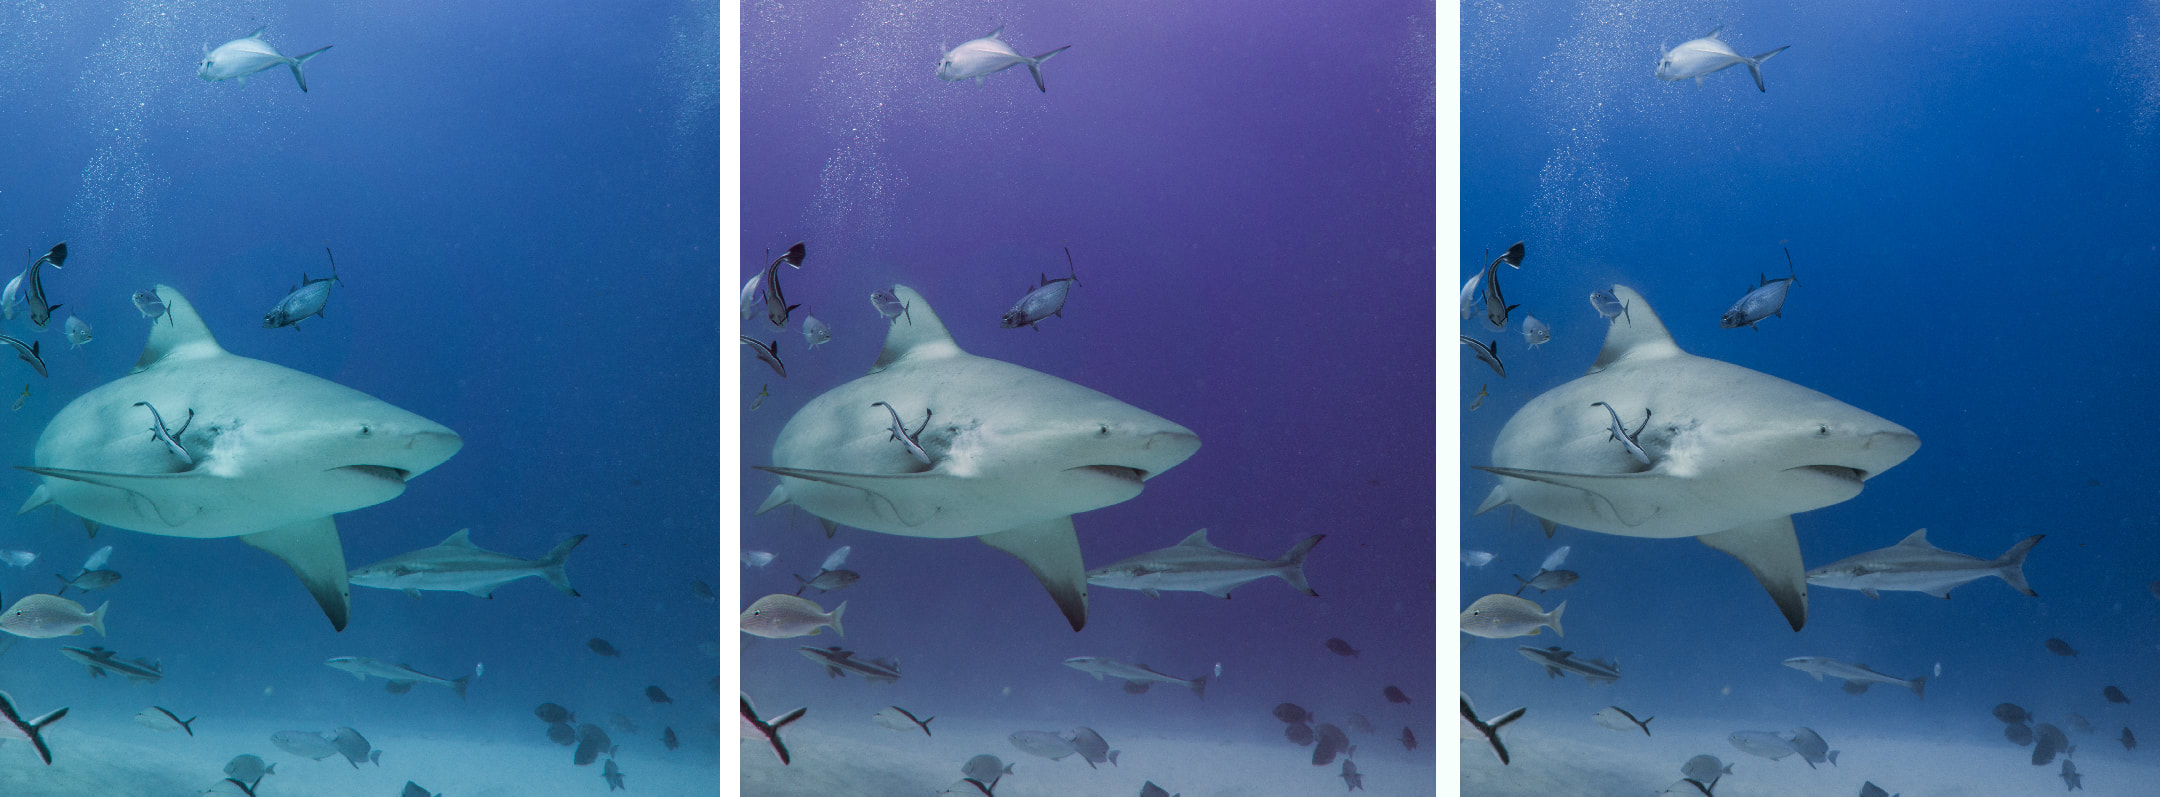
 Correct globally for shark, and water becomes too magenta. Hue sliders allow for adjusting colours separately For my friends who are using Lightroom or ACDsee image processing software, you can adjust targeted colours using the Hue, Saturation and Luminance sliders! It helps to understand colour, so if you were not interested in colour theory in art class back in your highschool days, here is a little cheat sheet. Your camera captures the colours Red, Green, and Blue, and your monitor displays colour by emitting light through Red, Green, and Blue phosphors. ALL the colours you see on screen are created by mixing these three colours in varying intensities. 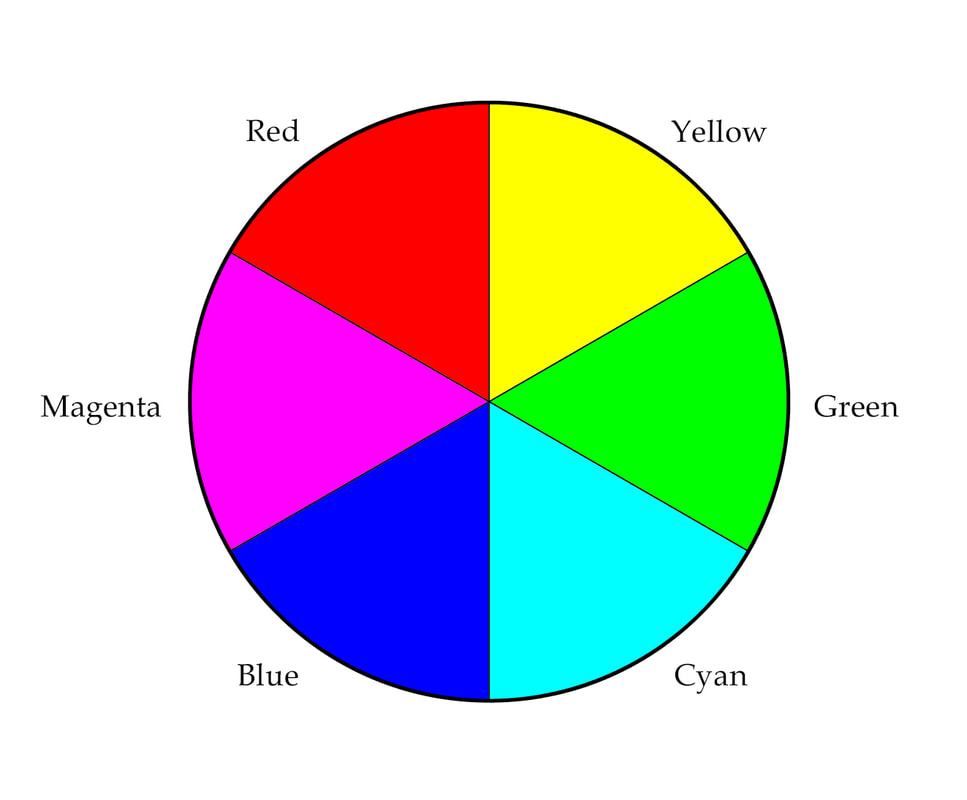 The colour wheel. The Colour Wheel Simply put, each colour on the wheel is created by mixing equal amounts of the colour on either side of it. For example, equal parts of Red light and Green light will result in YELLOW. Really! The colour directly opposite any colour on the wheel, represents its COMPLEMENTARY colour. If an image has a colour cast, you need to correctly identify the colour cast, and ADD its complimentary colour to neutralize it. 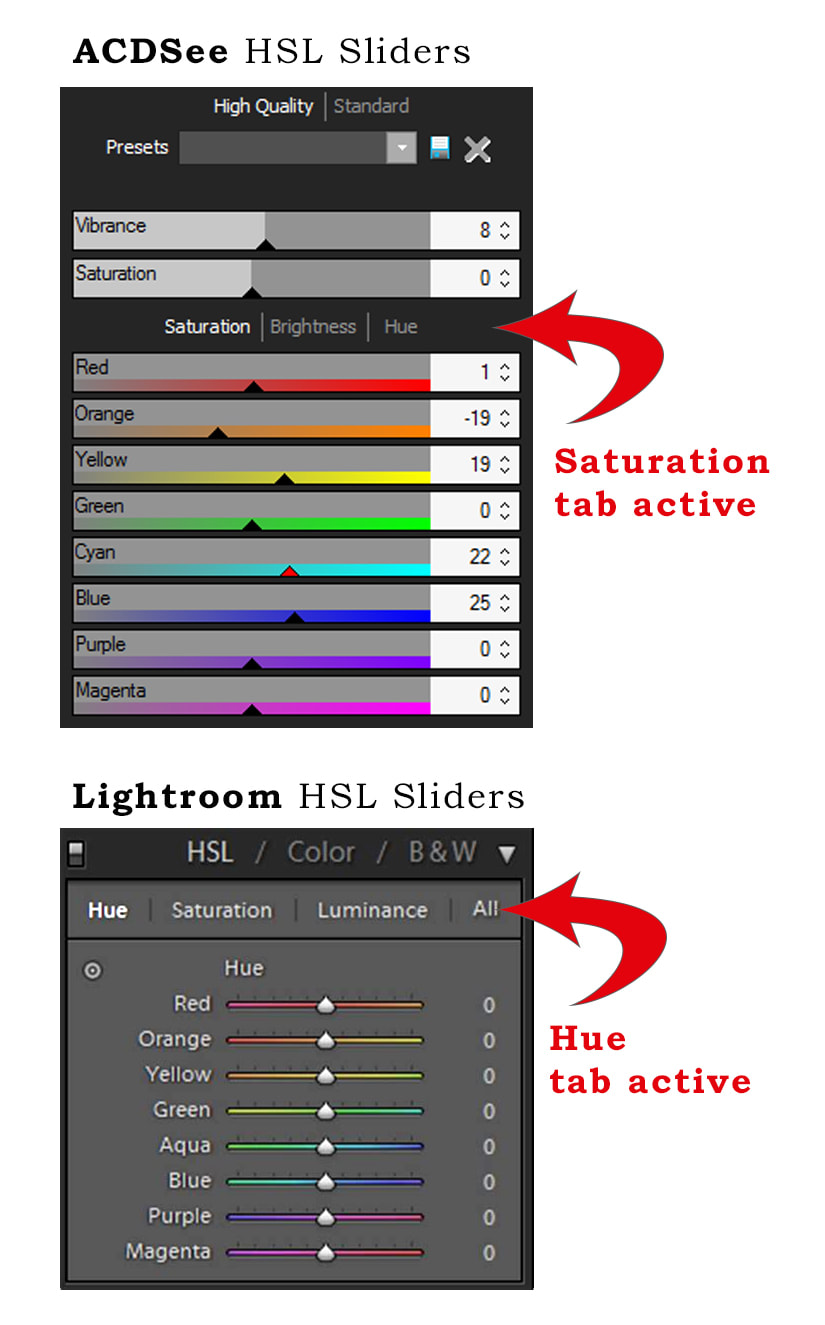 In the Lightroom slider panel, look to the left under the tab HUE. Click that double circle to click and drag colours directly on the photo. When we go diving, we notice significant colour loss in the scenery; Red, Orange, and Yellow light is filtered out of the water as we descend. This results in a very ugly colour cast that makes everything green or blue. If you have a colour cast of green (diving at the local lake), then you will want to adjust the white balance sliders by adding its complementary colour - Magenta. If the colour cast is Cyan, add Red. Sometimes colour correction of a subject or foreground results in undesirable colour in other parts of the photo, such as the shark picture at the top of this cheat sheet. The photo on the far left is direct from camera, the middle photo is the result of correcting colour for the shark (she was too green, so magenta/red was added), but this created a gross magenta colour cast in the water. It is so bad, that in the Hue slider, we adjust in the purple, sliding it to the left (toward blue), and blue to the left (toward cyan/green) to bring water back to blue. 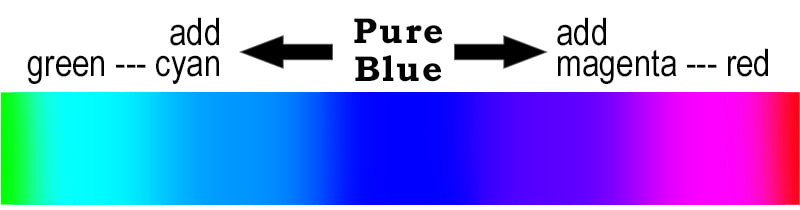 What colour is your water? The BLUE Hue Slider: Slide left for more green (becomes Cyan). Slide right for more red (becomes magenta). The Hue, Saturation and Luminance sliders can be found in a panel together in Lightroom, Adobe Camera Raw, and ACDsee Pro and Ultimate.
Hue This is where understanding your colour wheel comes into play. Change specific colours by moving sliders left or right. This means that the blue background of an underwater image can be made greener or pinker. Keep an eye on the other colours of the photo to make sure nothing is going awry. If another aspect of the photo is being detrimentally changed at the same time, then you may need to make a more specific target by using adjustment brushes to paint an effect on only an area of your choice (that's a cheat sheet for another day). Saturation Increase or decrease the brilliance of a specific colour in the photo. Luminance Darken or lighten a specific colour in the photo. Watch the effect particularly around edges to make sure weird halos aren't being created. Happy Sliding!
2 Comments
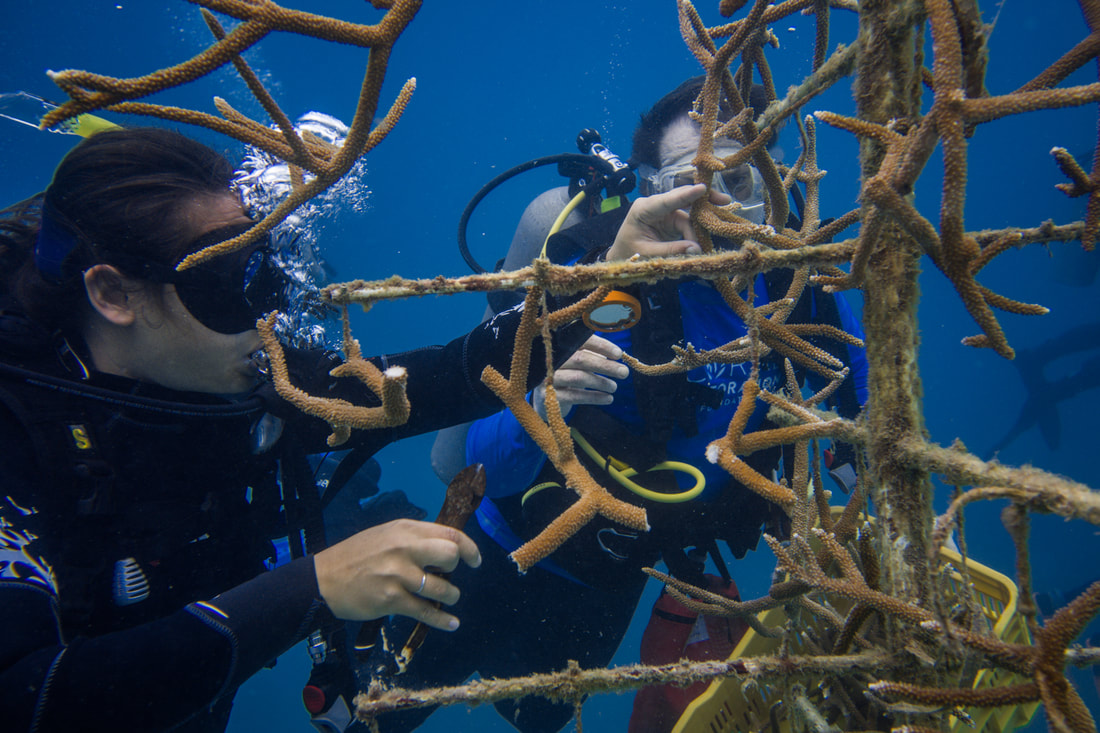
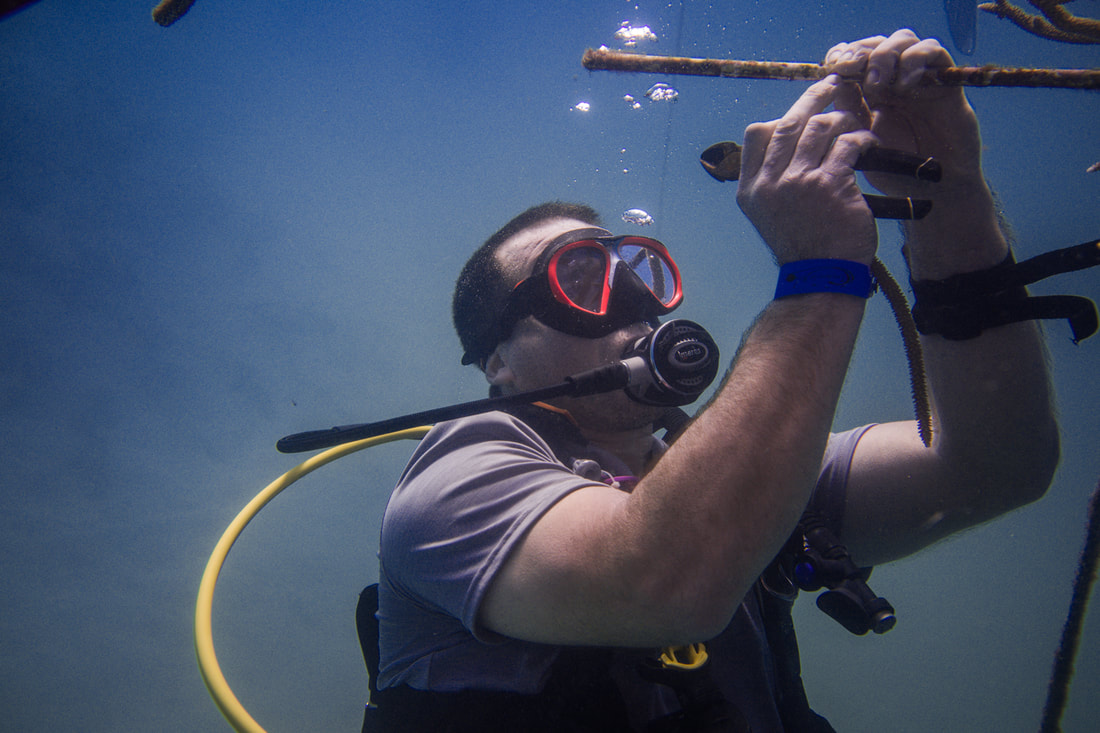
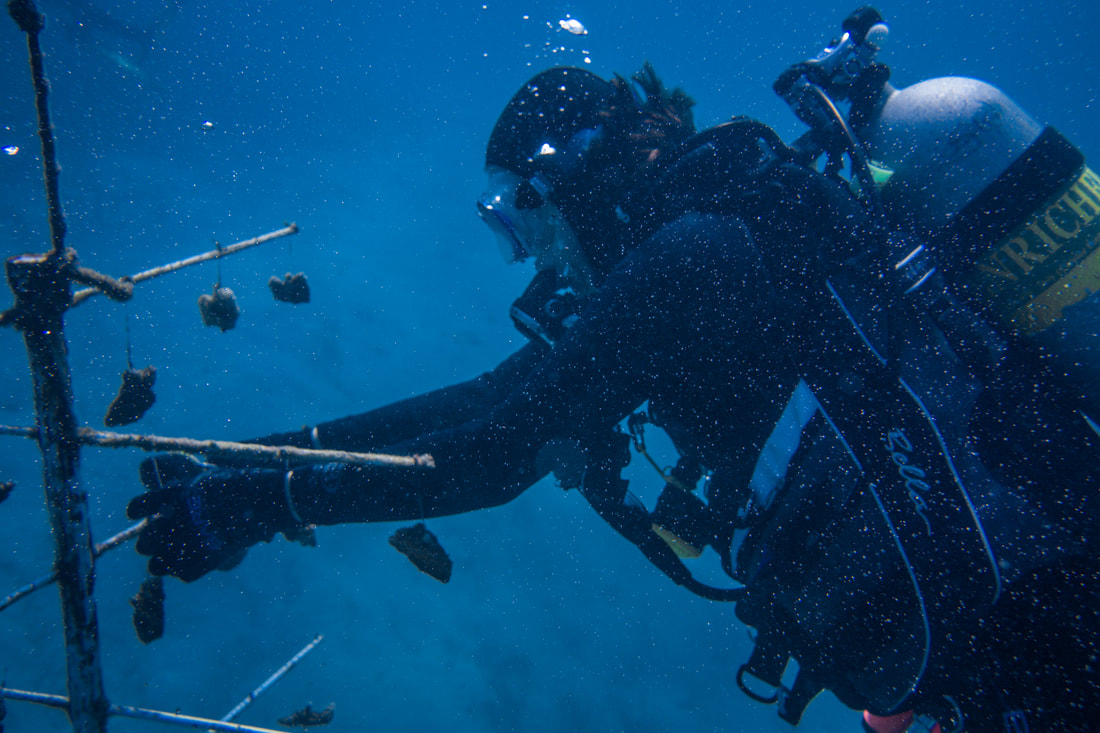
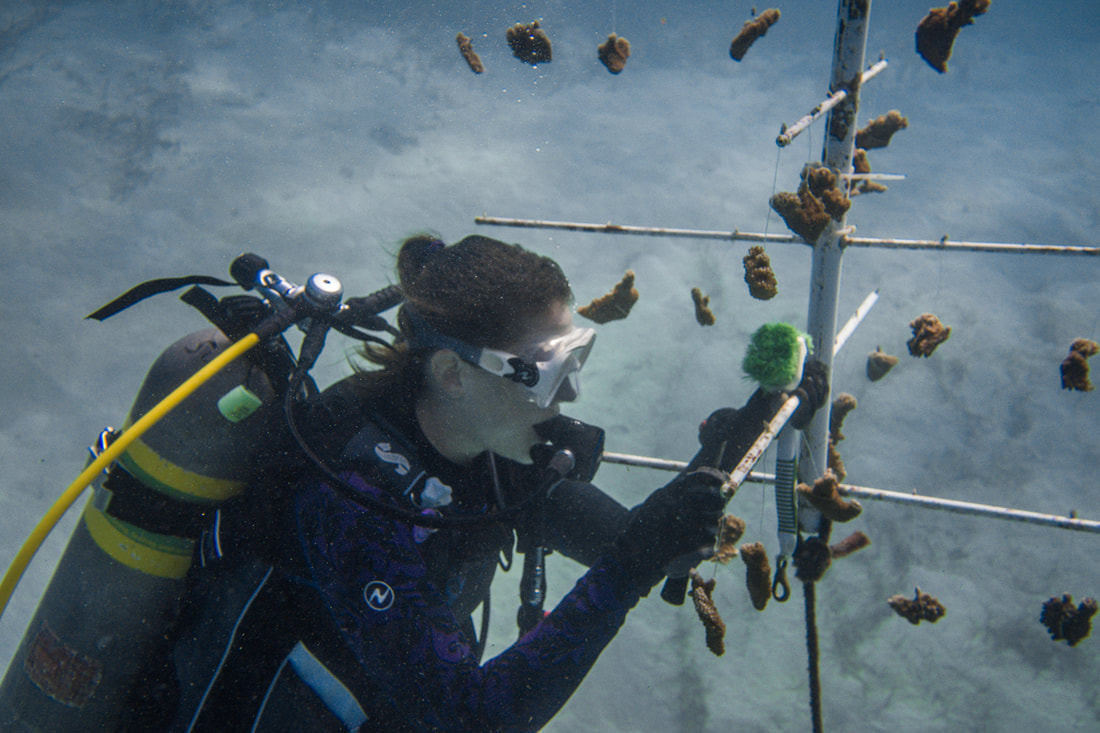
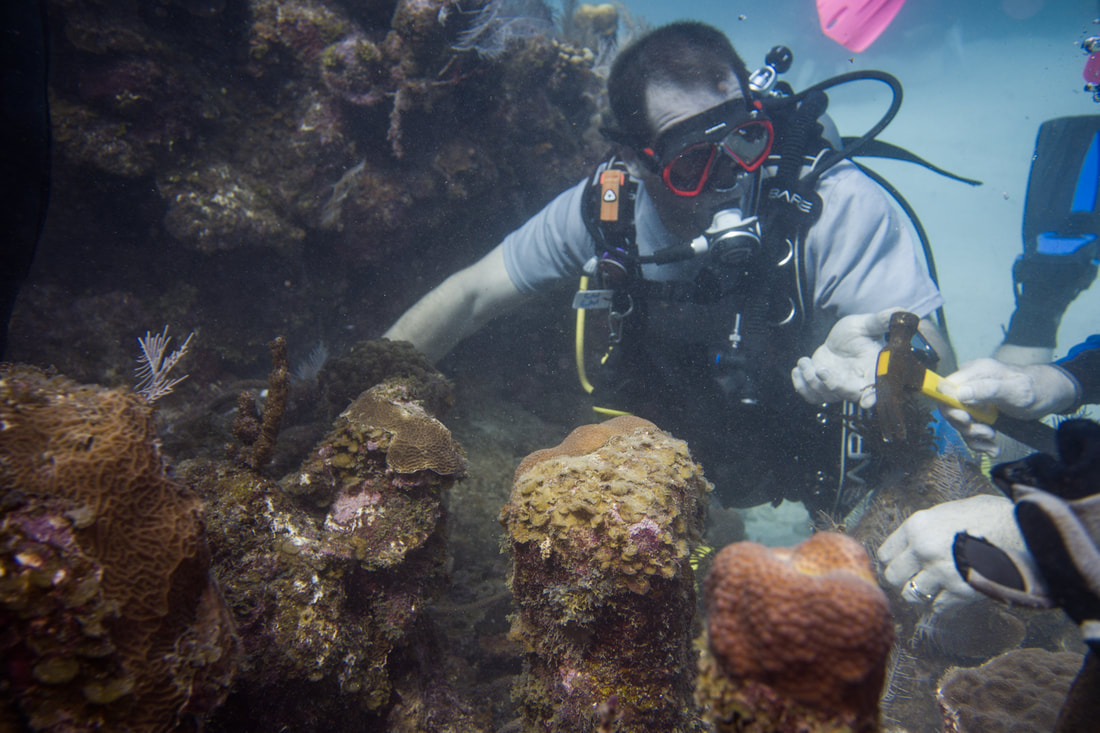
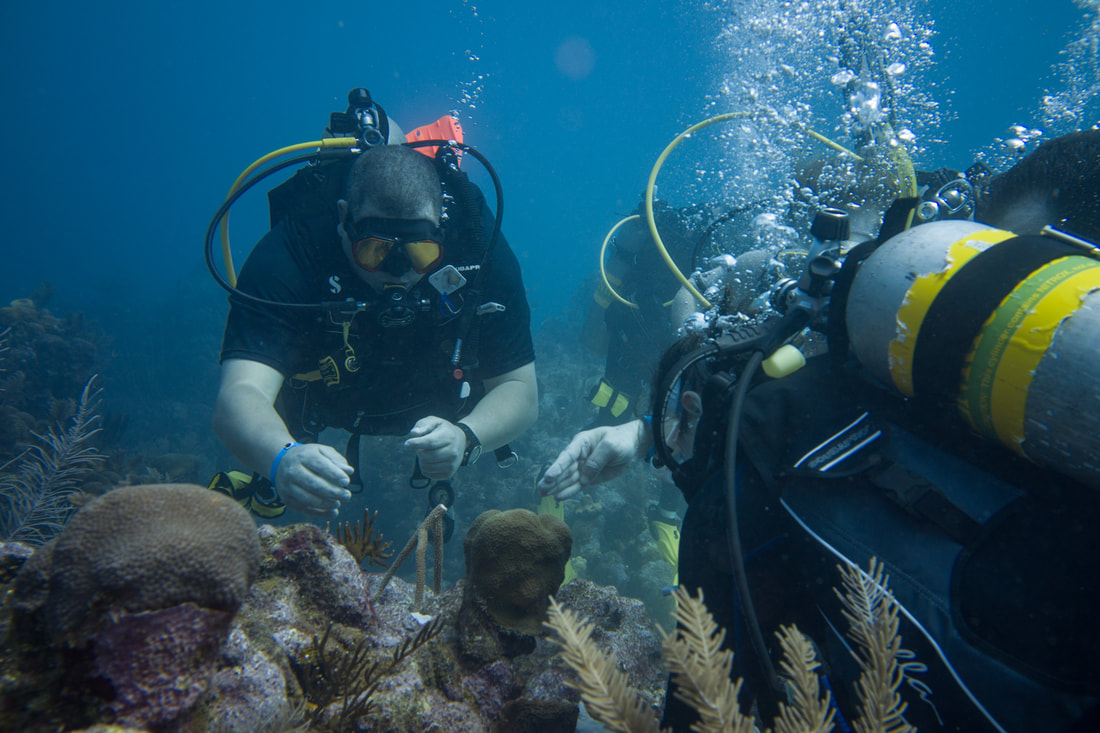
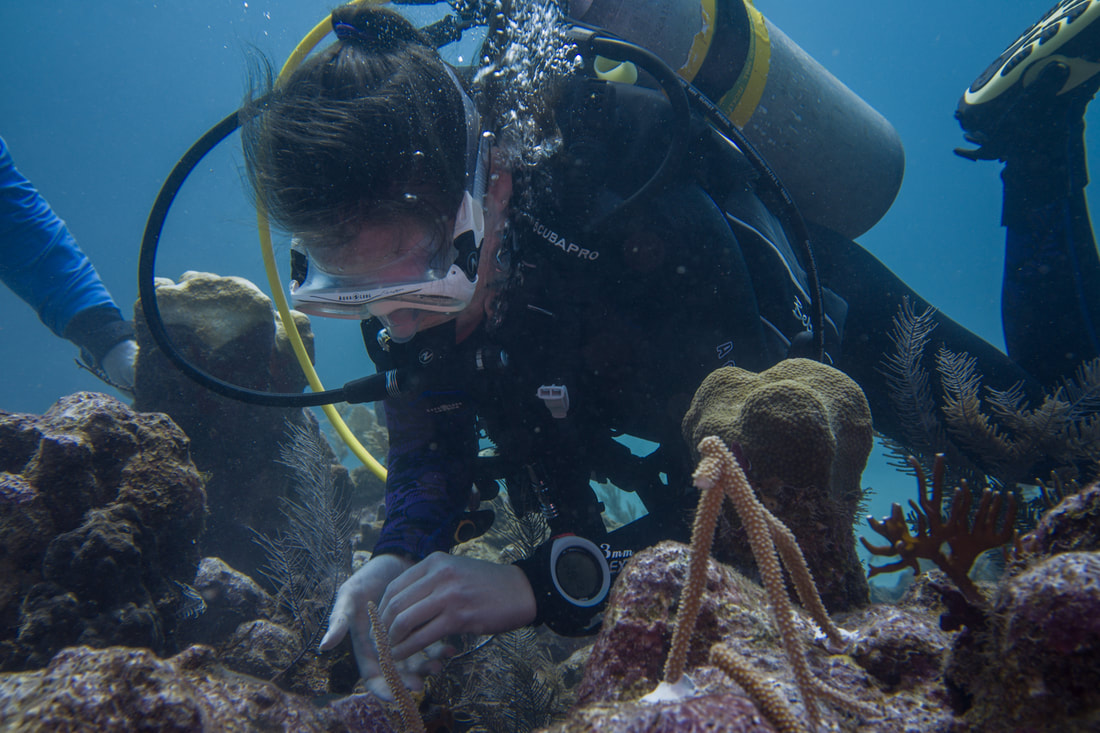
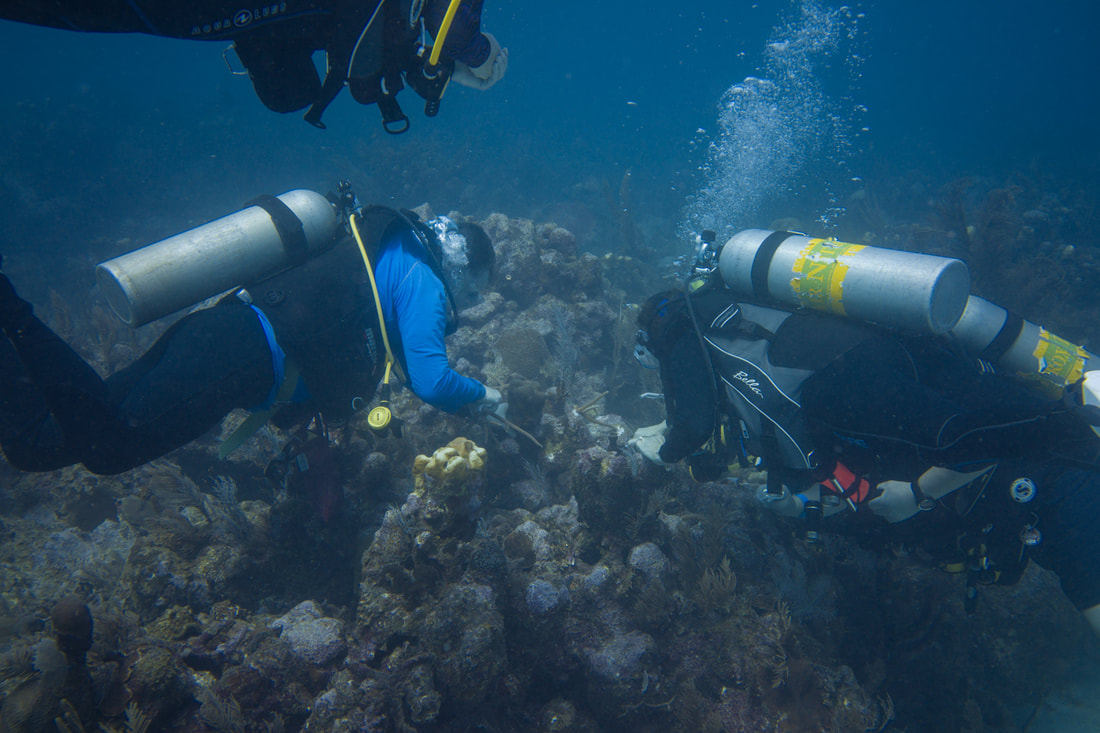
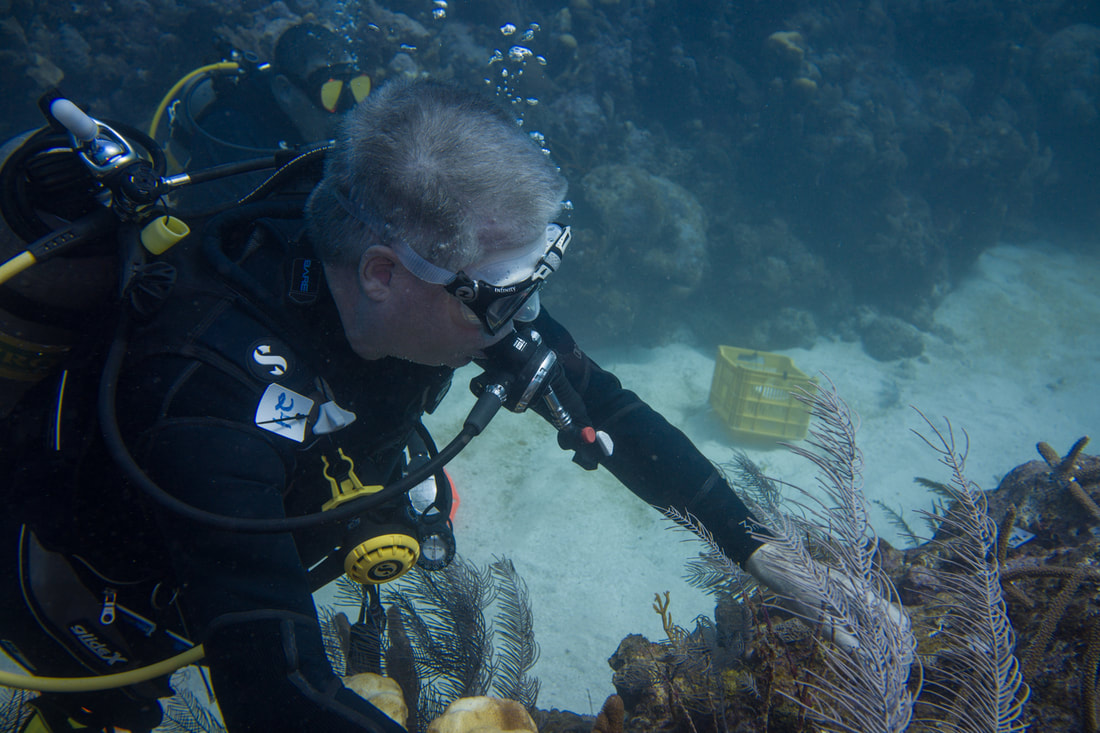
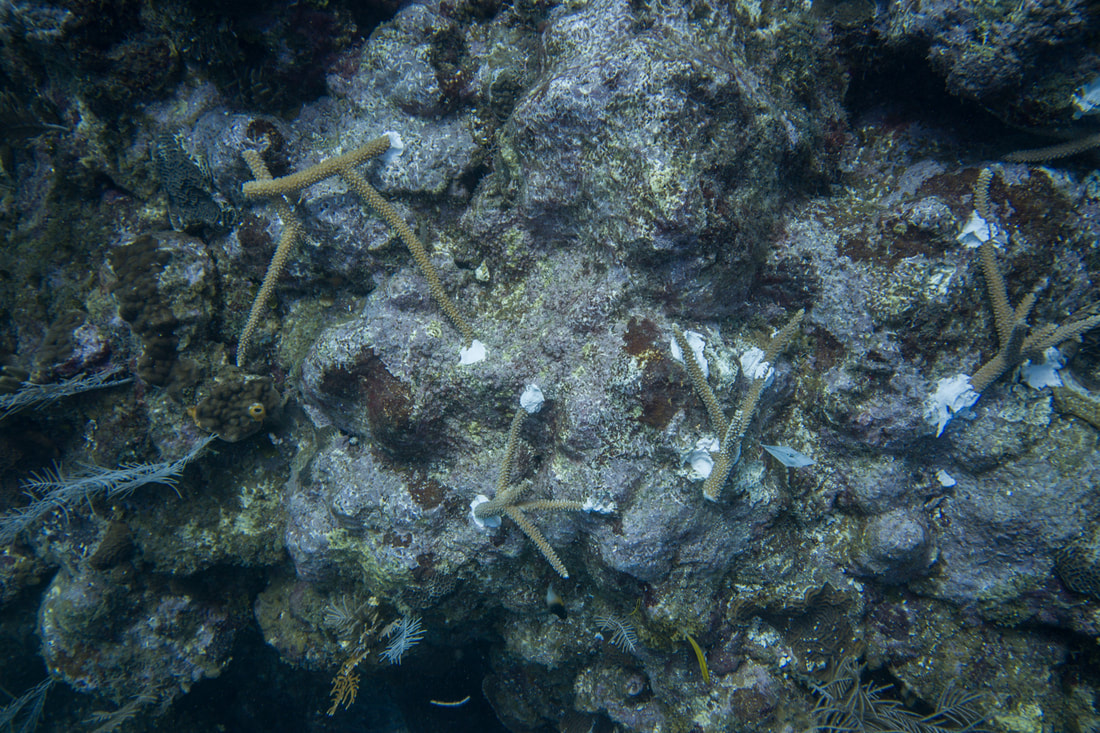
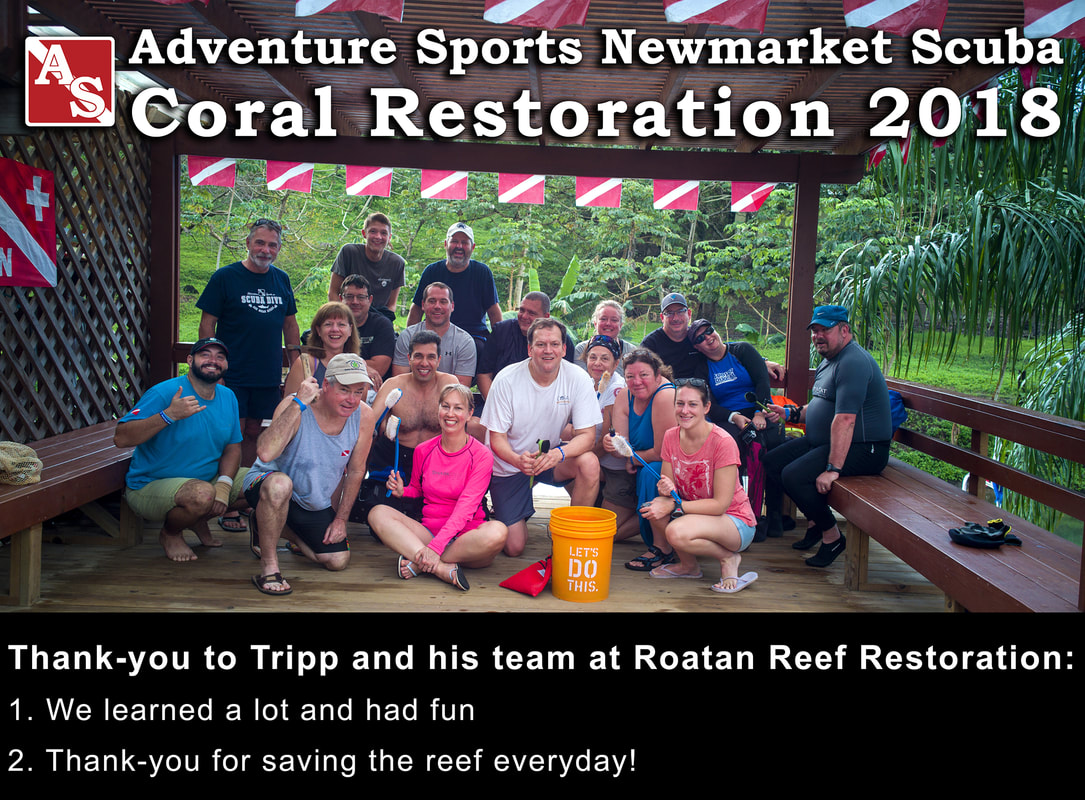 by Jill Smith What a WONDERFUL day! Our Adventure Sports Newmarket Scuba team of volunteer divers had the unique opportunity to assist the Roatan Reef Restoration (RRR) Organization, and the Coral Restoration Foundation today - divers stepped up! Note: The Roatan Reef Restoration Organization is relatively new; they could use your support by liking and following their efforts on Facebook! https://www.facebook.com/RoatanReef/ Tripp Funderburk of RRR, was a great teacher and team leader today, as we wet our feet in the world of coral restoration. If you are a scuba diver, you are probably aware of the decline of reef systems around the world, and already know how important they are to the health of our Earth. Both elkhorn and staghorn corals underwent serious declines in abundance in the 1970s and 1980s, and were listed as threatened under the US Endangered Species Act in 2006. This is an issue always near and dear to a diver's heart, so having the special opportunity to participate in this program meant a lot to all of us! In March 2016, Subway Watersports and the Turquoise Bay Resort proudly began the work to install two new coral nurseries in Roatan in partnership with the Coral Restoration Foundation International (CRFI), a Florida-based non-profit organization. This morning we were briefed on how to clean the coral in the nursery, followed by harvesting the coral from the "trees" on dive 1. For dive 2, we set out to "plant" our pieces of precious cargo! We were so excited! 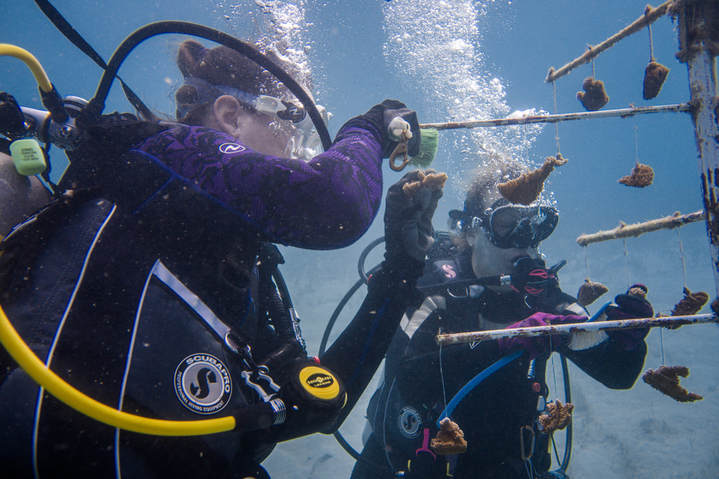 Jenn and I cleaning our tree. Dive 1: We learned that the first priority was to clean algae and fire coral from the growing coral, and the second priority was to clean the strings holding them in place, followed by the tree structure itself. We were armed with scrub brushes and chisels for tough fire coral. It felt strange to be scrubbing the actual coral, and found that it is not an easy job to do!  Geoff harvesting staghorn coral for replanting. Interestingly enough, since the coral nursery is sheltered from the elements somewhat by the reef system encircling the island, we found small baby species of many types of fish hanging around the corals. A juvenile sharp-nose pufferfish the size of my pinky, fought hard to stay close to the shelter of a coral bit growing on the tree Jenn and I were cleaning (the tree was shaking with all our scrubbing). Then we noticed a tiny fish hiding beside another coral(I'm guessing a juvenile fringed filefish according to my fish ID book); we almost missed it, because it looked like a small bit of debris (which was flying everywhere with our cleaning efforts)! As Jen and I worked, Gil and Jim caught our attention and called us over to the elkhorn tree they were cleaning, to show us a very tiny elkhorn crab hanging out in a crevice of the coral. Over lunch, Jim explained he was scrubbing the elkhorn and thought it was dirt - until he realized he was chasing it all around the coral, and it was NOT dirt, but a little crab! Jim reports that the little guy is clean and free of algae now! 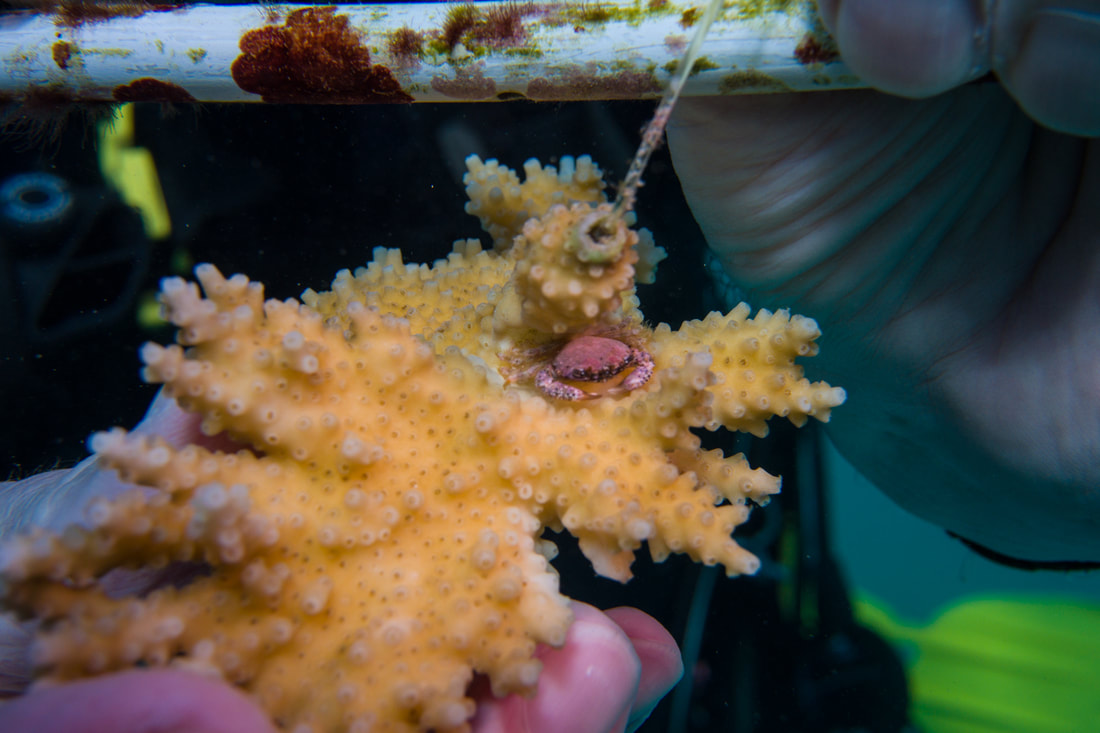 The little elkhorn crab! Awwww! 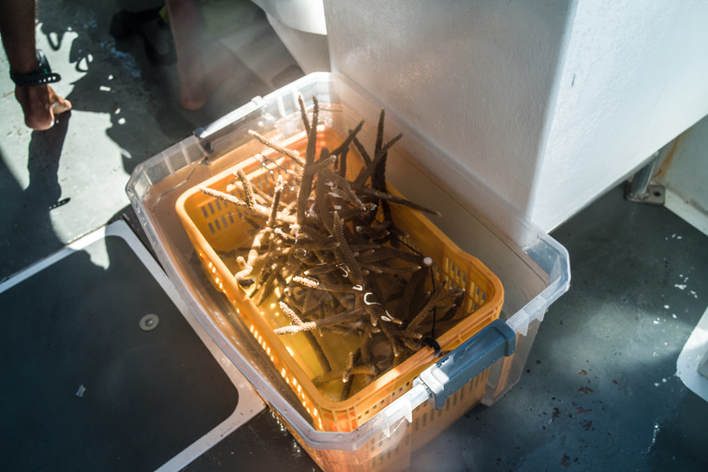 Harvested Staghorn coral immersed in water for transport to planting site. Harvested Staghorn coral immersed in water for transport to planting site. Dive 2: After our surface interval, and a lively debriefing, we headed out to an area of the reef where the foundation planned to restore staghorn growth. The parent coral had been harvested from its natural habitat at about 40 feet, the pieces had been growing in the nursery at about 20 feet, so the plan was to "plant" them at about 30 feet, and hope they continue to grow. The program has seen a lot of success.  Jim is almost finished his farming efforts! We were divided into 3 teams to work together to plant the corals in groups the size of a hoola hoop. We were armed with hammers and chisels. The idea is to find a place where the new coral seems to rest easily with natural stability, and at least 3 points of contact on the reef. Then we carefully chiselled and scraped away the coral in that section (about the size of an Oreo cookie) - this felt extremely wrong, because as you know, we try so very hard not to touch or disturb the reef, but it is important to clean an area at the point of contact so that the special epoxy used will stick and hold. We used a dollop of epoxy about the size of a Hershey's kiss to "glue" the coral points of contact to the reef. 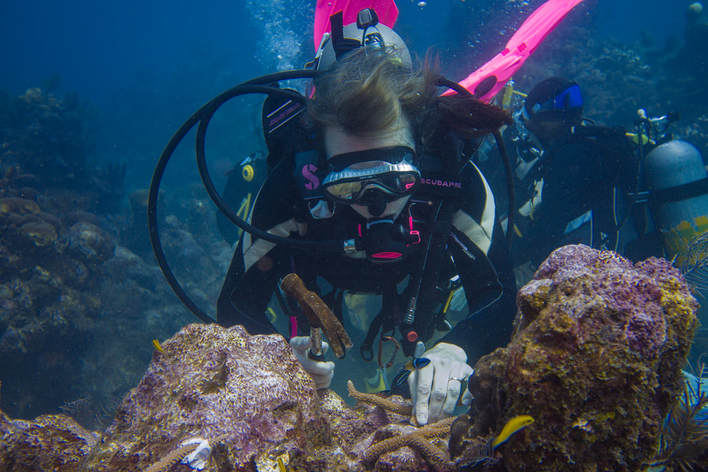 Planting staghorn at the site. Can you see the blue head wrasse and rainbow wrasse interested in what we are doingÉ Planting staghorn at the site. Can you see the blue head wrasse and rainbow wrasse interested in what we are doingÉ It was very amusing to watch the behaviour of the resident fish on the reef we were working on. Little Rainbow wrasses and Blue headed wrasses were almost in our way as we worked. I guess the cloud of stuff that churns up as we chisel contains a great deal of food for them. They seemed pretty happy and excited about our work. The damsel fish, however, was very angry. We were building near its house, and it was mad about it. After our team planted the last bit of coral for our section, we were observing our handiwork (semi) proudly, and didn't that little stinker come out of its hole, all aggressive-like, knock one of our corals over, and dart back in its hole! But we did it! We did a small thing to help our ocean, and it was THE. BEST. DAY. EVER! Group Flickr Album |
 FlickrAlbumAuthorsJill Smith 
Coral Restoration
Archives
January 2024
Categories
All
 
|


 RSS Feed
Our Services |
Company |
SupportOur Blog
|
|
Copyright © 2014
|
Newmarket, ON
|
(905) 898 5338
|