|
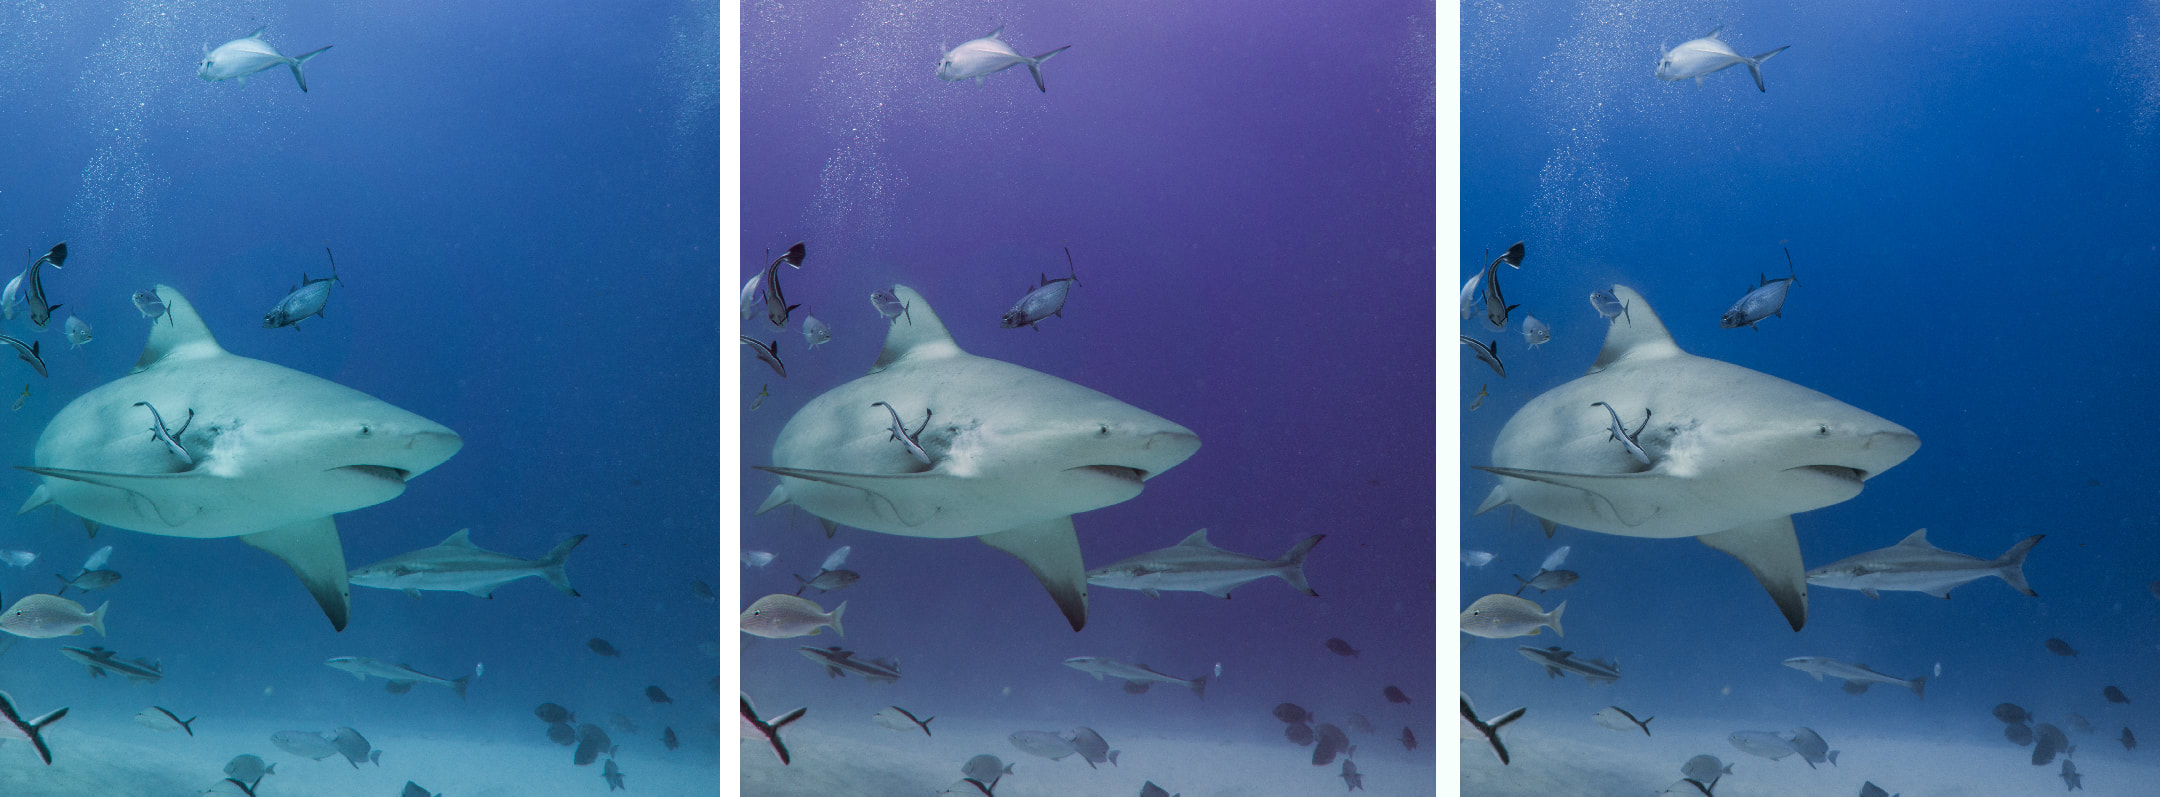
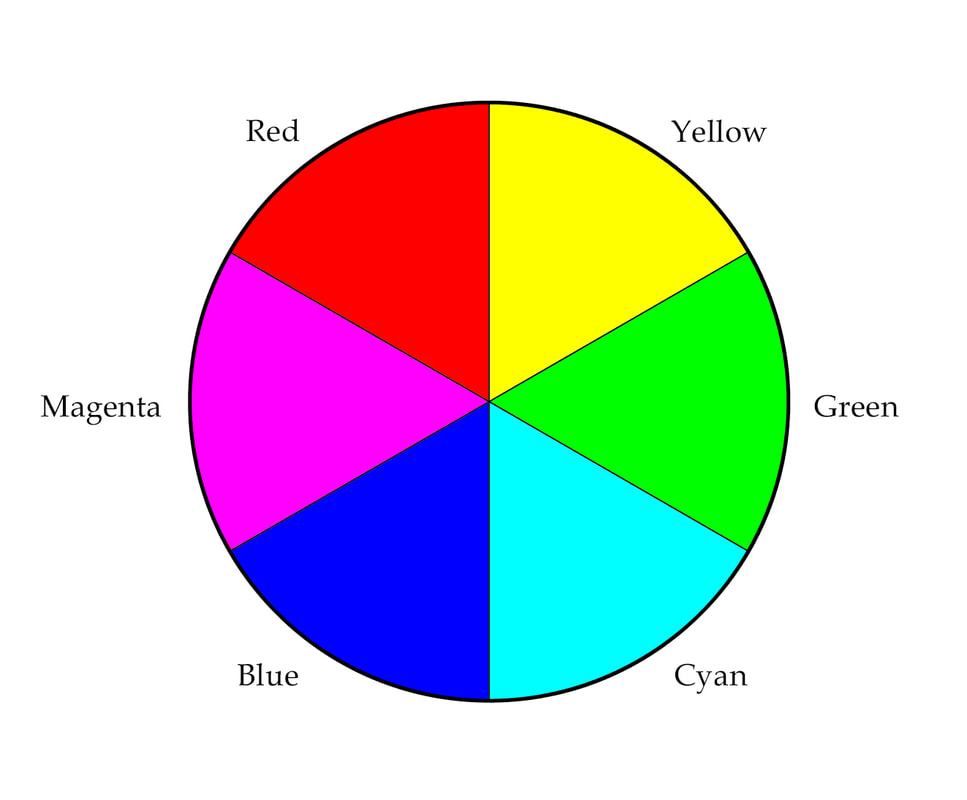
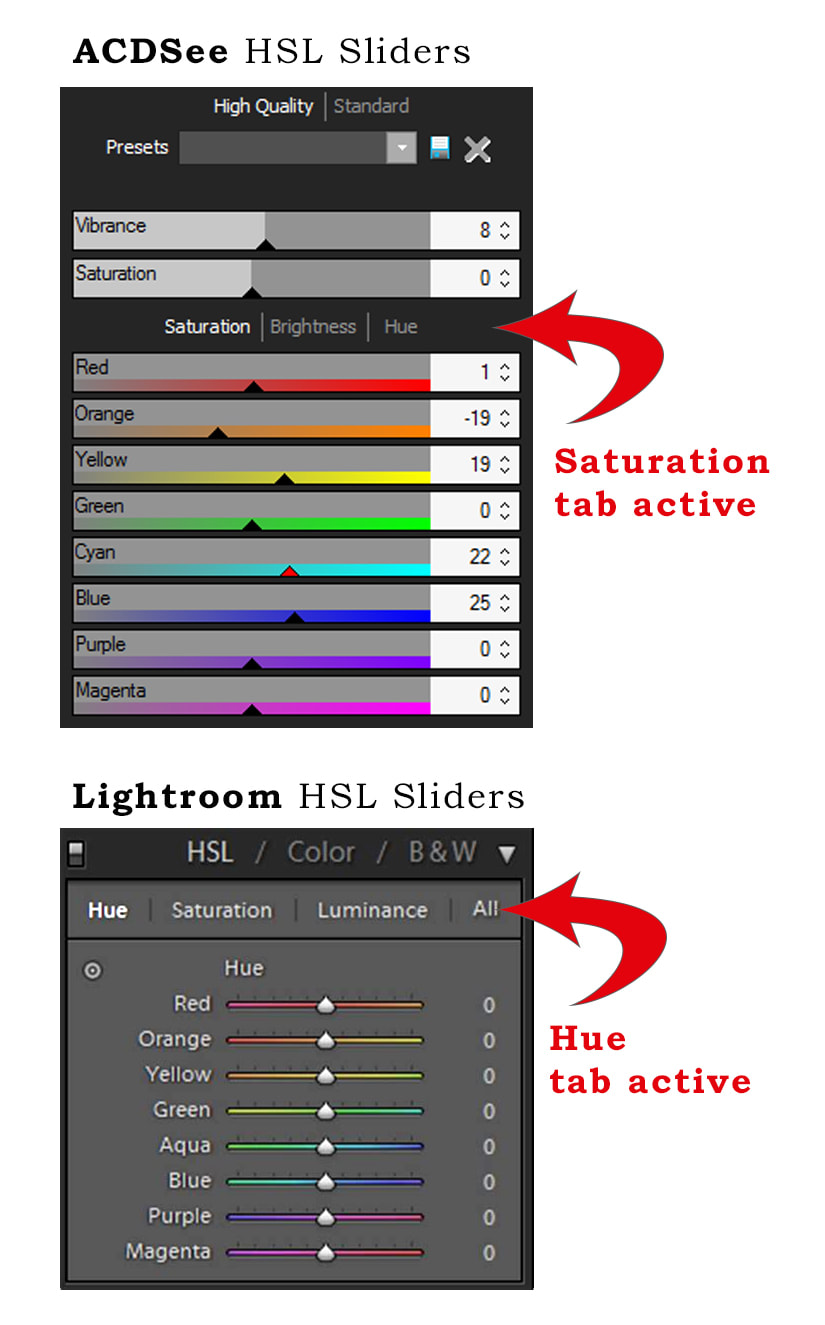
For my friends who are using Lightroom or ACDsee image processing software, you can adjust targeted colours using the Hue, Saturation and Luminance sliders! It helps to understand colour, so if you were not interested in colour theory in art class back in your highschool days, here is a little cheat sheet. Your camera captures the colours Red, Green, and Blue, and your monitor displays colour by emitting light through Red, Green, and Blue phosphors. ALL the colours you see on screen are created by mixing these three colours in varying intensities. The Colour Wheel Simply put, each colour on the wheel is created by mixing equal amounts of the colour on either side of it. For example, equal parts of Red light and Green light will result in YELLOW. Really! The colour directly opposite any colour on the wheel, represents its COMPLEMENTARY colour. If an image has a colour cast, you need to correctly identify the colour cast, and ADD its complimentary colour to neutralize it. When we go diving, we notice significant colour loss in the scenery; Red, Orange, and Yellow light is filtered out of the water as we descend. This results in a very ugly colour cast that makes everything green or blue. If you have a colour cast of green (diving at the local lake), then you will want to adjust the white balance sliders by adding its complementary colour - Magenta. If the colour cast is Cyan, add Red. Sometimes colour correction of a subject or foreground results in undesirable colour in other parts of the photo, such as the shark picture at the top of this cheat sheet. The photo on the far left is direct from camera, the middle photo is the result of correcting colour for the shark (she was too green, so magenta/red was added), but this created a gross magenta colour cast in the water. It is so bad, that in the Hue slider, we adjust in the purple, sliding it to the left (toward blue), and blue to the left (toward cyan/green) to bring water back to blue. The Hue, Saturation and Luminance sliders can be found in a panel together in Lightroom, Adobe Camera Raw, and ACDsee Pro and Ultimate.
Hue This is where understanding your colour wheel comes into play. Change specific colours by moving sliders left or right. This means that the blue background of an underwater image can be made greener or pinker. Keep an eye on the other colours of the photo to make sure nothing is going awry. If another aspect of the photo is being detrimentally changed at the same time, then you may need to make a more specific target by using adjustment brushes to paint an effect on only an area of your choice (that's a cheat sheet for another day). Saturation Increase or decrease the brilliance of a specific colour in the photo. Luminance Darken or lighten a specific colour in the photo. Watch the effect particularly around edges to make sure weird halos aren't being created. Happy Sliding!
2 Comments
the Minimist
19/2/2018 12:30:05 pm
Great blog, very helpful for those, like me, who are just getting into photo editing.
Reply
Jill Smith
19/2/2018 02:45:33 pm
It’s a small cheat sheet, I hope it serves you well...Rick?!
Reply
Leave a Reply. |
FlickrAlbumAuthorsJill Smith Archives
January 2024
Categories
All
|
Our Services |
Company |
SupportOur Blog
|
|
Copyright © 2014
|
Newmarket, ON
|
(905) 898 5338
|


 RSS Feed

