|
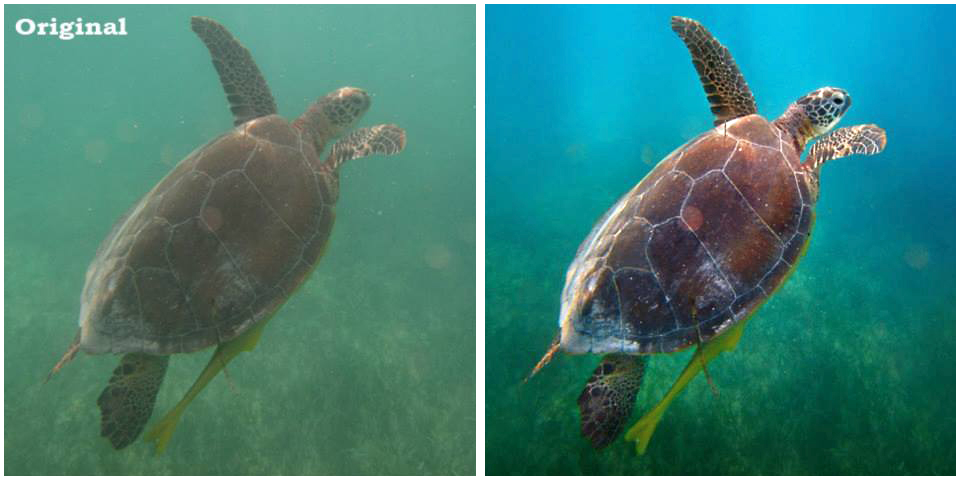
By Jill Smith If you are taking pictures underwater, then you already know that no matter how great the shot is, it is going to need some work post-processing. It is an unfortunate truth that light does not travel through water as it does through air, so we have to deal with a severe loss of colour as the red (followed by orange and then yellow), gets filtered out inch by inch. The more water between you and your subject, the more the colour gets filtered out. First of all, don't use Photoshop as an excuse to get sloppy with photography. Getting the best shot possible from the point of click, not only makes the post-processing easier, but the final result will be so much better! How many divers are using Adobe Photoshop to colour correct their underwater photography? If not Photoshop or Lightroom, what do you use? Feel free to add comments below and share your experiences with us! If there is interest, I will keep posting some of the tips and techniques that work for me, and for anyone who wants to contribute, we can share your tips and successes too! Do It In the RAW No joke. My whole camera choice was based on the priority of my needs. Priority number 1: I want to shoot in RAW. Why?
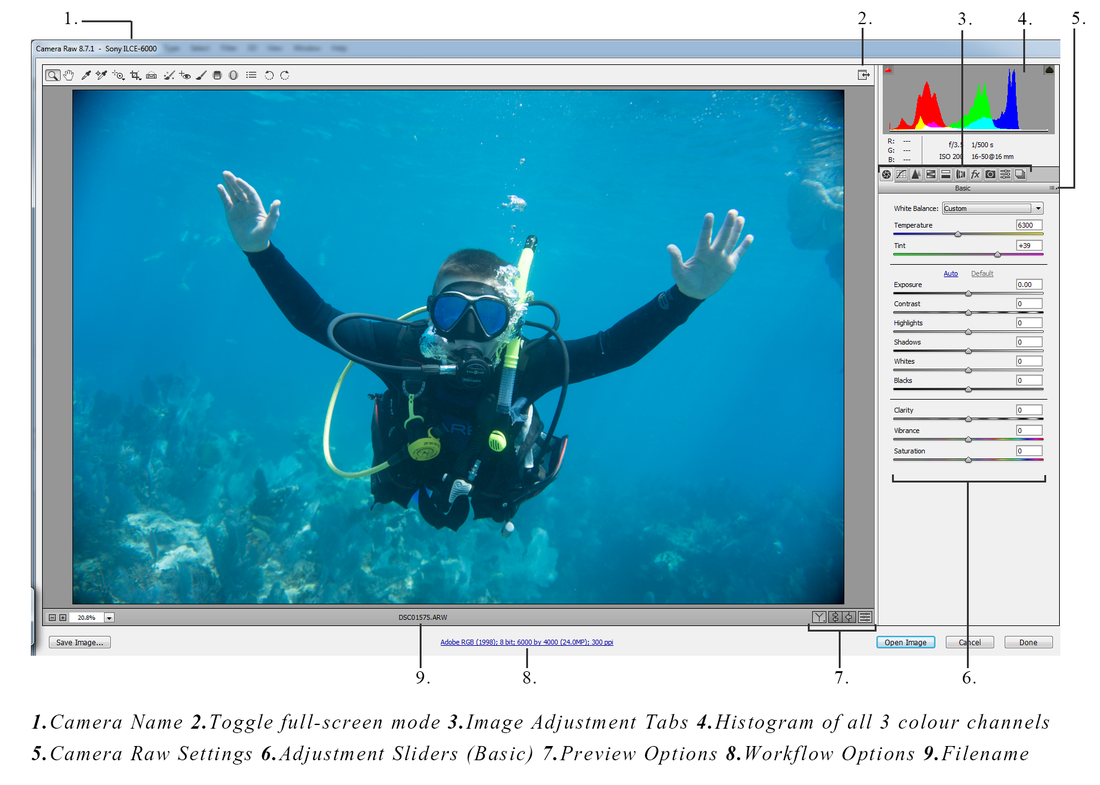
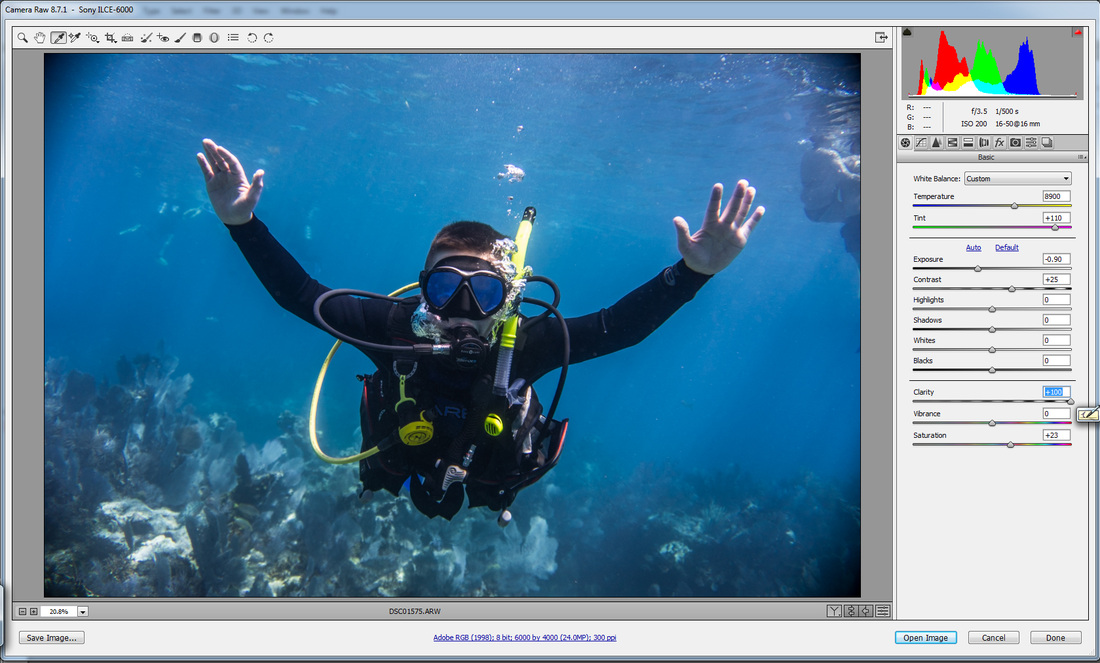
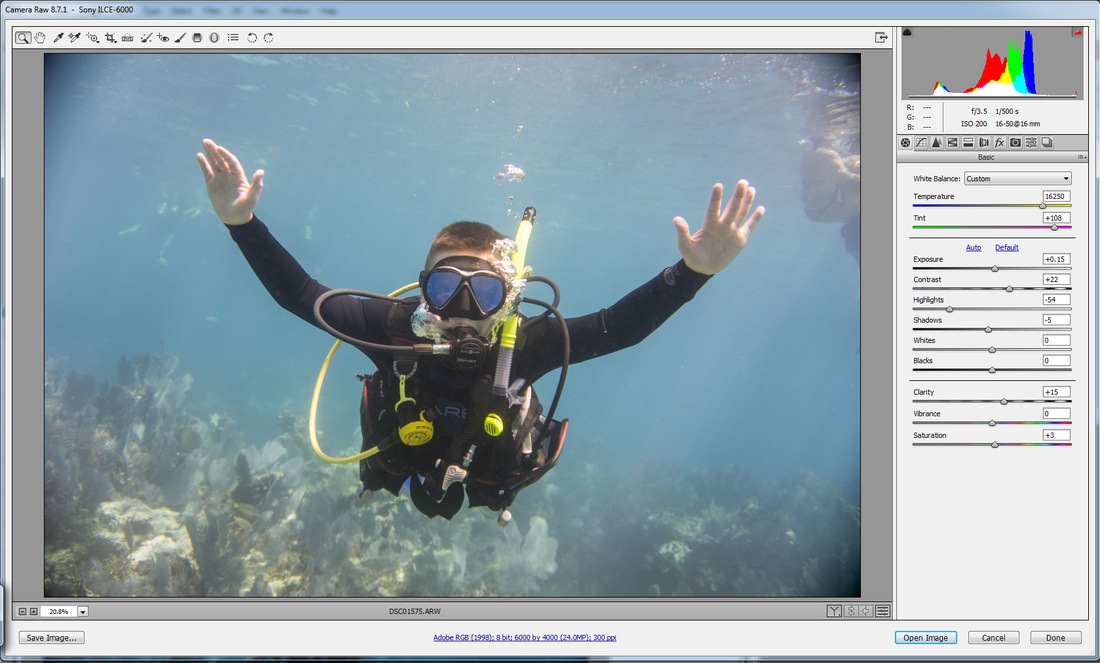
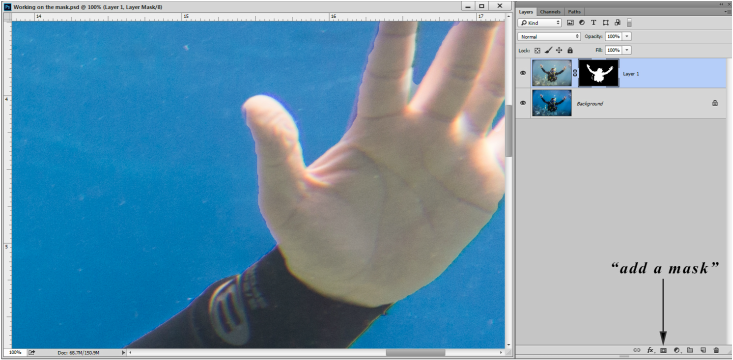
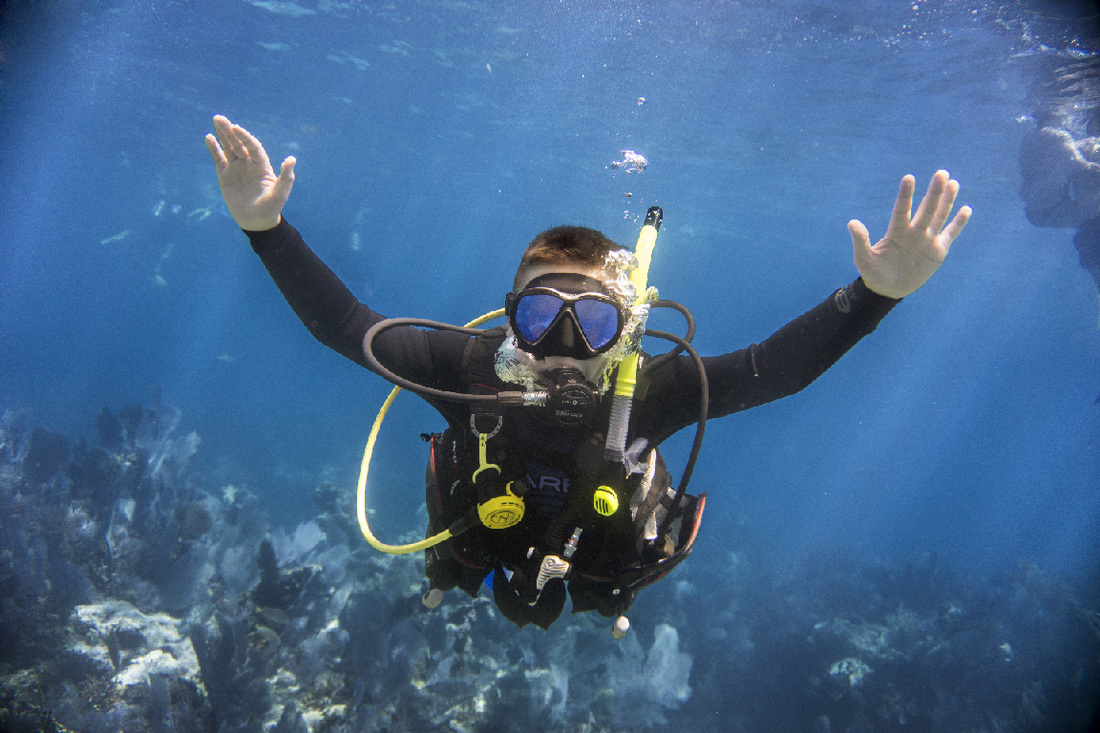
Priority number 2: I wanted to find a compact, mirrorless camera that had all the capabilities of a DSLR. So, I decided to purchase the Sony A6000 mirrorless camera (already obsolete), and a Nauticam housing (new November 2016: 2.8 16mm wide angle lens with a dome port for my housing!). Using Camera Raw One method of underwater colour correction enhancement I use frequently is to open the RAW image in Camera Raw and make adjustments for the water, and ignore the subject matter entirely. Once the image exposed for water is open in Photoshop, I then re-open the RAW image in Camera Raw, and this time I make adjustments for the subject. Both versions are opened in Photoshop. This is purely subjective. I love the deep blue of the water, and I want to keep that. In the image below, (opened in Camera Raw) I can see I am having a problem with the vignette shadows in the corners. I was aware of this problem when I got my Nauticam Housing for the Sony A6000, and simply forgot to tweak the zoom in a little bit to avoid that. That can be corrected or cropped out at the end. Above is a map of the Camera Raw dialogue box (basic). Under the adjustment tabs there are sliders for making basic adjustments to the image: Temperature and Tint - these are for adjusting white balance. I use these a lot for underwater images Exposure - there is a little wiggle room here if the exposure is off. Exposure can be increased or decreased by up to 5 stops. Contrast - Slide the contrast up or down Highlights - may be nominally useful if you have strong highlights you wish to tone down. Shadows - open up the shadows in an image they are too dark Whites - adjusts white clipping (clip whites more or less) Blacks - adjusts black clipping (clip blacks more or less) Clarity - creates a super-contrast effect on mid-tones (similar to a large radius sharpen) Vibrance - a kind of smart saturation tool; vibrance increases saturation of low saturated colours, but has less effect on colours already high in saturation. Saturation - increases saturation of all colours equally  White Balance Tool White Balance Tool For those of you who like the second image and would not wish to do anything further, I used the white balance tool in Camera Raw to make the wetsuit neutral. You can find that in the top menu bar beside the hand tool. Click the dropper and then click an area in the image that you KNOW to be black or gray neutral; I used a part of my son's arm. I chose an area that was neither in shadow nor highlighted, just a good representation of the wetsuit. Most of what you see there is a result of the white balance tool. I may have tweaked a few settings here and there, but not much. When you are satisfied with your adjustments, click "Open Image" (bottom right area of the dialogue box). Now there are two images open on the Adobe Photoshop desktop.  Move Tool Move Tool Select the move tool from the tool bar on the left side of the desktop. While holding the SHIFT key down, click on the image adjusted for the subject, and drag over to the image adjusted for the background. Let go of the mouse before you release the shift key. If done correctly, you will have both images stacked together in one document, perfectly aligned (holding down the shift key while dragging the image over places it in the perfect centre). Confirm this by checking your layers palette on the left side of the desktop. With the layers tab highlighted (at the top of the palette), you should see two layers stacked underneath. You will only see the top layer in the image window. To ensure that they are aligned properly, turn the eyeball icon on and off of the top layer to show the layer underneath (eyeball icon is to the left of the thumbnail of the top layer in the Layers palette). If they are perfectly aligned, then we are ready to start working on our layer mask. 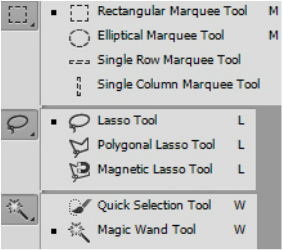 Selection Tools from the Tool bar Selection Tools from the Tool bar Make a Selection Make a selection of everything but the subject, and mask out the background of the top layer - allowing the background of the bottom layer to show through. There are a few selection tools to choose from. Under the Move tool on the tool bar, there are 3 options for selections: Rectangular Marquee, Lasso, and Magic Wand. Further to that, there is a tiny triangle in the bottom left corner of each of those icons, meaning that there are more tool options underneath. Click and hold the icon to reveal the mini-menu. I chose the Quick Selection tool, found under the Magic Wand. Click and drag to add pixels of similar colour and tonal value to the selection. The selection will show like a row of marching ants around your edges. If it adds too much, hold the alt key down (notice the little minus icon inside your cursor) and click and drag the tonal values you wish to subtract from the selection.  Brush Tool Brush Tool Create a Layer mask Once the selection is done, go to the bottom of the Layers Palette and click the "add a mask" icon (or go to Menu > Layer > Layer Mask > Reveal Selection). The "add a mask icon is to the right of the fx icon and looks like a circle within a rectangle. Make sure your top layer is selected when you do so. Now we have a layer mask applied to the top layer based on our selection. The thumbnail to the right of the image thumbnail shows us what is masked in black to allow the underneath layer to show through. While the Quick Selection Tool does a great job in areas where the edge contrast is very pronounced, there may be some areas that need "tweaking". We can simply use the paintbrush tool to brush the black in areas we wish to mask, and white in areas we wish to unmask. To edit the mask, select it in the Layers Palette (you will see the highlight box surrounding it), and select your brush from the tool bar. Your foreground colours should be black and white, but to make sure they aren't any shade of gray, reset them by hitting the letter "D" on the keyboard. You will be painting on the mask with the foreground colour. If you wish to change from black to white (or back again), hit the "X" key on your keyboard. Other Keyboard Shortcuts to help Edit Mask: Increase or Decrease Brush Size: Square Brackets (beside P) Zoom in: Hold the Spacebar and the Ctrl key as you click inside the image Zoom out: Hold the Spacebar and the Alt key as you click inside the image Navigating within a zoomed image: Hold Spacebar down and the hand tool will appear. Click and drag while continuing to hold the Spacebar down to navigate within a zoomed image. You can make any adjustments you wish to either layer and they will remain separate. Done! Flatten Image (Menu > Layer > Flatten Image). Happy Editing!
1 Comment
Only for the Bravest The Bermuda Triangle, also called the Devil's Triangle, is an area that can be roughly outlined on a map by connecting Miami, Florida; San Juan, Puerto Rico; and the Bahamas, an island chain off the coast of the United States. Dive over 350 of the most beautiful wrecks you may ever see in your lifetime! You will dive the mystic, majestic and battered shipwrecks and airplane wrecks littering this area. UFO sightings are not promised, although very possible. This is a once in a lifetime opportunity! Cost breakdown:
$9999.00 Live-aboard boat. Meals and beverages included. Flights not included. The good news? Travel expenses are half-off for one-way flights! You’re going to want to take advantage of this offer today! We will even throw in a T-shirt! Navigation: Readings on directional devices do not operate normally inside the triangle. We recommend that adventurers learn how to navigate the stars, sun and wind; yes folks, this is a sterling opportunity to get in touch with your roots and navigate the way our ancient ancestors did! Depth: Variable – it’s a big area Experience Level required: It really doesn’t matter Preparation: Dive gear packed, tanks provided Waivers must be signed and assets signed over to ASN. Happy April Fools Divers! From all of us at Adventure Sports Newmarket Inc. (Note: we are NOT going on the above trip) 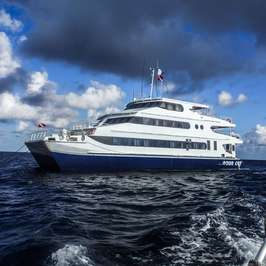 The Aqua Cat last November The Aqua Cat last November Thinking Ahead... “There's nothing wrong with enjoying looking at the surface of the ocean itself, except that when you finally see what goes on underwater,you realize that you've been missing the whole point of the ocean. Staying on the surface all the time is like going to the circus and staring at the outside of the tent.” ― Dave Barry Aqua Cat $2399 USD NOT Included: Dive & snorkel gear (available for rent) Port tax, fuel surcharge & park fee Crew gratuity (15% recommended) Dinner Friday night Airfare to Nassau Nitrox ($150 for the trip) Included: Accommodations All meals & snacks (except dinner Friday night) All beverages (soda, rum drinks, vodka, beer & wine) All shore excursions All scuba diving including tanks & weight belts Transfers on Saturday to & from the airport 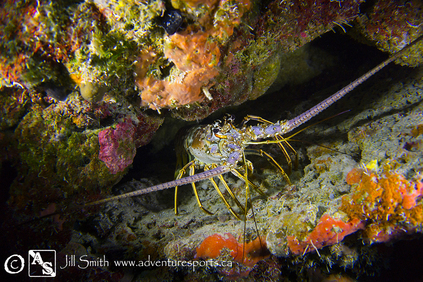 Last year's Aqua Cat Album Last year's Aqua Cat Album The Aqua Cat will offer you the best in liveaboard scuba diving and snorkeling in the Bahamas. You will cruise from Nassau, Bahamas to the remote islands of the Exumas, and especially the Exuma Cays Land and Sea Park, the most pristine area in all the Bahamas. For over 30 years, much of the northern Exumas has been a National Underwater Park with no fishing, spearfishing or collecting allowed. Because of these laws there are miles and miles of undersea gardens. The reefs are perfect for snorkeling with gin clear waters and lots of fish. You’ll log a large variety of dives; shark feeding dives, blue holes, high speed drift dives, walls and reefs at all depths. You will love every minute of it! This is the ultimate escape aboard your own private luxury yacht. Imagine sinking your toes into sugar sand, snorkeling or diving among the sharks and sting rays, or hiking the trails of pirates and bootleggers of years gone by. No crowds, no set itineraries, nothing to do but sit back, relax and choose from an incredible variety of activities including scuba diving, snorkeling, kayaking, fishing, sunbathing, and island exploring. Blackbeard's is taking Deposits for November (7-13)!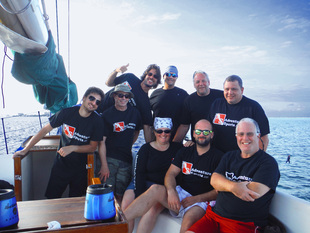 Blackbeard's $900 USD NOT Included: Dive & snorkel gear (available for rent) Port tax, fuel surcharge & park fee Crew gratuity (15% recommended) Airfare to Nassau Included: Accommodations All meals & snacks (except dinner Friday night) All beverages (soda, rum drinks, vodka, beer & wine) All scuba diving including tanks & weight belts Transfers on Saturday to & from the airport You will experience truly virgin diving in the Exumas. For over 30 years, much of the northern Exumas has been a National Underwater Park with no fishing, spearfishing or collecting allowed. Because of these laws there are miles and miles of undersea gardens. The reefs are perfect for snorkeling with gin clear waters and lots of fish. 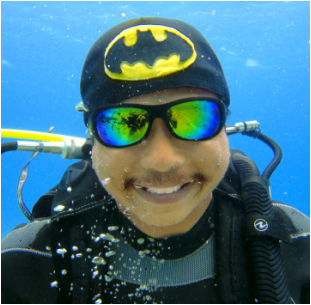 Ed doing what he does best; having fun! Ed doing what he does best; having fun! Adventure Sports Newmarket Inc. now has the honourable distinction of being a PADI 5-Star IDC centre! We are very excited to embark on the next chapter of growth and new experiences for all! Edward Chan will be offering the IDC program through our shop, beginning this spring. He is a very experienced diver and instructor, and has been a PADI Course Director since 2009, earning his DAN Instructor Trainer rating in the same year. Edward is also a EFR Instructor Trainer. We are looking forward to working with Edward, and we think this year is going to be AWESOME! If you love diving, love people, and love teaching, please consider joining us for PADI PRO night; Ed and Jody will hosting an evening where you can learn about this exciting program, ask questions (and get answers) and find out if becoming a PADI Open Water Scuba Instructor is right for you. Interested in the Instructor Development Program? We invite you to join us for orientation night! Date: Wednesday March 25, 2015 Time: 6:00 pm Place: Adventure Sports Newmarket Inc. 205 Eagle St. Newmarket ON L3Y 1J8 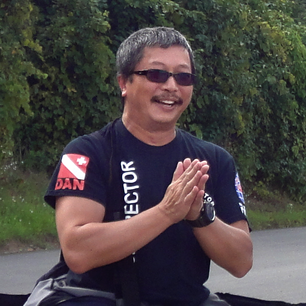 PADI Instructor Development Course (IDC) The Instructor Development Course (IDC) is made up of two parts – the Assistant Instructor (AI) course and the Open Water Scuba Instructor (OWSI) program. Most dive professionals complete the entire IDC and go on to attend an Instructor Examination (IE), which is the final step to earn a PADI Instructor certification. PADI Assistant Instructor Course PADI Assistant Instructors and Open Water Scuba instructors are the most sought after scuba professionals in the world because they’ve completed the program that sets the standard for training dive professionals. You earn a PADI Instructor rating through hard work and commitment, but you’re rewarded with a job that lets you share incredible underwater adventures with others – transforming their lives for the better and enriching yours. As a PADI AI, you will continue to grow with experience as a PADI professional scuba diver, and you will become familiar with the PADI's diver education programs. This knowledge and experience will allow you to mentor and teach others, acting as an instructional scuba assistant, and also give you some limited teaching responsibilities. The PADI Assistant Instructor course is the first portion of the PADI Instructor Development Course (IDC) and when followed by the Open Water Scuba Instructor course (OWSI) and successful performance at the Instructor Examination (IE), leads to certification as a PADI Open Water Scuba Instructor. Open Water Scuba Instructor Course (OWSI) A PADI Divemaster who has been a certified diver for six months may enroll in the PADI Instructor Development Course. You also need: - At least 60 logged dives and 100 dives to attend and IE (Instructor Exam) - Emergency First Response Primary and Secondary Care (CPR and First Aid) training within the past 24 months. - A medical statement signed by a physician within the last 6 months. You also need to be an Emergency First Response Instructor, but you can earn this rating during your instructor training. Over a minimum of five days, but usually more like seven, the IDC teaches you to conduct all PADI core courses. You’ll be able to organize and present information, conduct skill development sessions and control open water dives. Basically, you become a better public speaker and get really good at demonstrating skills while watching out for student diver safety. Key topics include: -PADI Standards and Procedures for courses you can teach with in water workshops -Learning, Instruction and the PADI System -Risk Management and Diver Safety -The Business of Diving and your role as an instructor -Marketing Diving and Sales Counseling * All IDC candidates will get a Specialty Instructor Rating when they participate in my IDC program. AWARE - Shark Conservation Diver
(included with the IDC program - please note that the AWARE Specialty offered may be subject to change without notice, but you WILL receive a Specialty Instructor Certification with your IDC) Sharks are crucial to marine ecosystems, yet sharks are in a global decline. Learn about the value of sharks and what is causing the rapid loss of shark populations. The course may include two scuba dives or may be presented as a nondiving education program. The first dive of this distinctive specialty course may credit as an Adventure Dive toward your Advanced Open Water Diver certification – ask your instructor about earning credit. Contact Jody Smith at Adventure Sports Newmarket Inc. to customize a program for you! There will be more information and questions can be answered at the Tank Jockeys Club Meetings: Tuesday March 10, 7:00 pm at AllStar Wings'n'Ribs Yonge St. Newmarket, ON. Tuesday April 14, 7:00 pm at AllStar Wings'n'Ribs Yonge St. Newmarket, ON. |
FlickrAlbumAuthorsJill Smith Archives
January 2024
Categories
All
|
Our Services |
Company |
SupportOur Blog
|
|
Copyright © 2014
|
Newmarket, ON
|
(905) 898 5338
|




 RSS Feed

